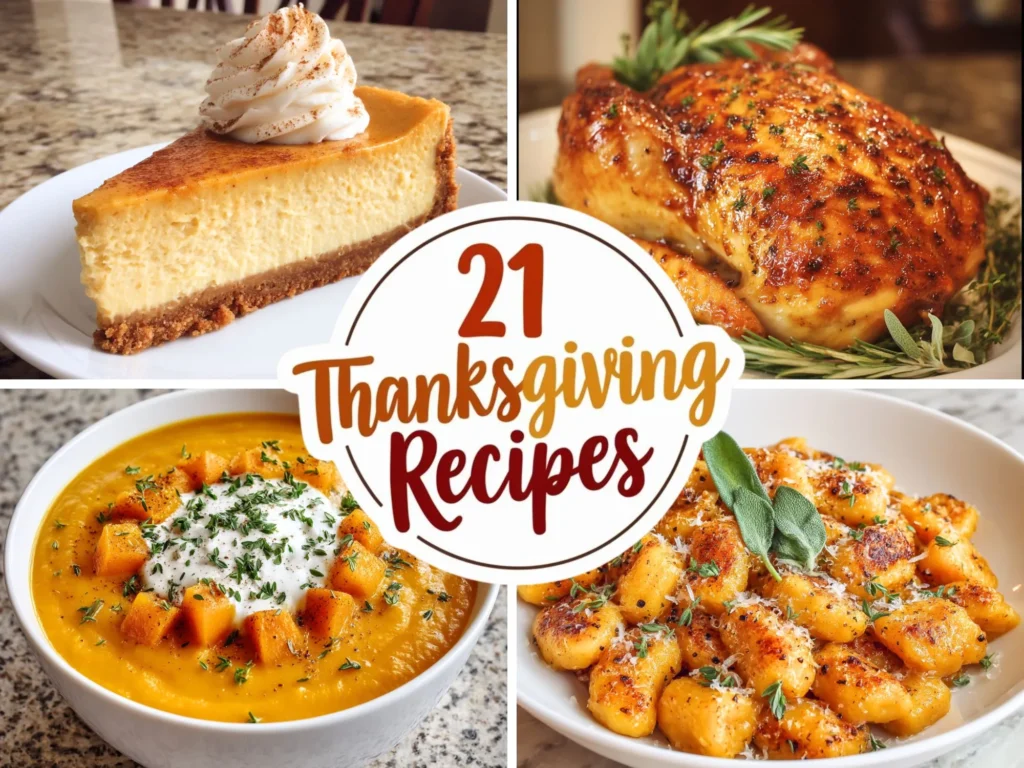
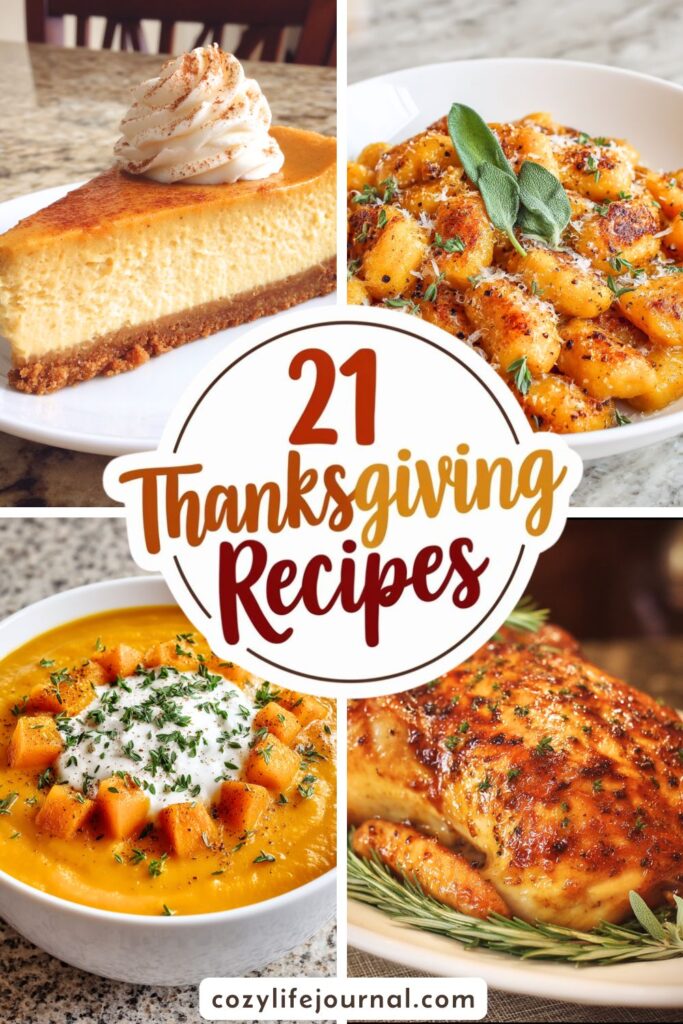
Thanksgiving has always been one of those magical times of the year for me. There’s something about the crisp fall air, the smell of turkey roasting, and—let’s be honest—the laughter (and occasional chaos) of family gatherings. Every year, without fail, I find myself reaching for the same recipes, ones that have become traditions in my home. These thanksgiving recipes are the dishes that make everyone at the table smile—whether it’s the first bite of creamy mashed potatoes or that slice of pumpkin pie that makes you regret not wearing stretchy pants.
And now, I’m sharing these 21 beloved recipes with you. They’ve been through years of trials, triumphs, and yes, a few kitchen disasters. But don’t worry, I’ve ironed out the kinks so you can avoid that “oops, I forgot to defrost the turkey” moment. Let’s dive into it, and hey, feel free to chime in—what’s your go-to Thanksgiving dish?
Creamy Butternut Squash Soup: A Bowl of Autumn Bliss
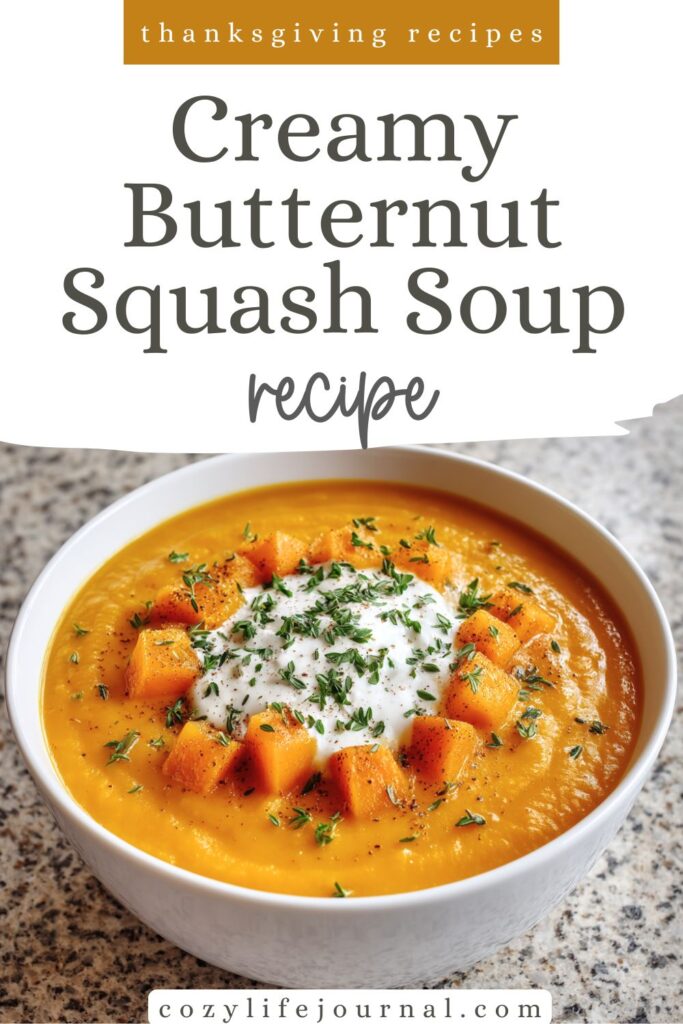
Let’s talk comfort food—but make it golden, velvety, and just a little luxurious. This creamy butternut squash soup is basically a warm hug in a bowl. Imagine the gentle sweetness of roasted squash, the richness of coconut milk swirling in, and just the right whisper of garlic and onion to keep it grounded. It’s the kind of soup that makes you want to pull on fuzzy socks, light a candle, and lean into the cozy.
Every time I make this, I think of crisp fall evenings where the kitchen windows fog up from the bubbling pot, and the smell alone is enough to draw a crowd. Whether you’re curled up solo or feeding a hungry crew, this soup hits the spot.
🥣 The Recipe: Creamy Butternut Squash Soup
Ingredients:
- 1 large butternut squash, peeled, seeded, and cubed
- 1 large onion, chopped
- 2 cloves garlic, minced
- 4 cups vegetable broth
- 1 cup coconut milk (or heavy cream if you’re feeling indulgent)
- Salt and pepper, to taste
- Fresh thyme, for garnish
Instructions:
- Prep the Veggies: Peel and cube your butternut squash (a sharp peeler is your friend here), chop the onion, and mince the garlic.
- Sauté: In a large pot, heat a tablespoon of olive oil over medium heat. Add onion and garlic, and cook for 5–7 minutes until soft and fragrant—but don’t let the garlic get cranky and brown.
- Simmer: Toss in the squash cubes, stir to coat, then pour in the broth. Bring to a boil, then lower the heat and simmer for 20 minutes, or until the squash is fork-tender.
- Blend: Use an immersion blender to blend until creamy-smooth. No immersion blender? Carefully transfer in batches to a regular blender. (And yes, let it cool slightly first—hot soup + blender = Jackson Pollock situation.)
- Creamy Finish: Stir in coconut milk (or cream) and let it simmer for 5 more minutes. Season to taste.
- Serve It Up: Ladle into bowls, garnish with fresh thyme, and serve hot.
🌿 Variations & Substitutions
- Swap the Coconut: Not a fan of coconut milk? Go with heavy cream, half-and-half, or even cashew cream for a dairy-free alternative.
- Add Warm Spices: A pinch of nutmeg, cinnamon, or curry powder takes it in a new (and very tasty) direction.
- Roast the Squash First: For deeper flavor, roast the squash cubes at 400°F for 25 minutes before adding to the soup pot.
- Make It a Meal: Add cooked lentils or a scoop of quinoa for some protein power.
❄️ Storage, Prep & Make-Ahead Tips
- Fridge: Keeps beautifully for up to 5 days in an airtight container.
- Freezer-Friendly: Cool completely before freezing in portions—perfect for quick lunches.
- Reheat Gently: On the stove or in the microwave, add a splash of broth if it thickens too much.
🧺 Packing Tips
Pour into a thermos or insulated food jar for a piping-hot lunch on the go. Toss in some crusty bread or a grilled cheese sandwich, and you’ve got yourself a portable hug.
⏱️ Time-Saving Hacks
- Pre-cut Squash: Grab a bag of cubed squash from the produce section to skip the peeling.
- Batch It: Double the recipe and freeze half—you’ll thank yourself later.
- One-Pot Wonder: This recipe all happens in a single pot, so cleanup’s a breeze.
⚠️ Allergen Info & Diet Versions
- Dairy-Free: Check! (If you use coconut milk.)
- Nut-Free & Gluten-Free: Naturally so.
- Vegan-Friendly: 100%, just double-check your broth label.
🥦 Healthy Tips & Nutrition Notes
Butternut squash brings fiber, vitamins A and C, and beta-carotene to the party. Coconut milk adds healthy fats, and if you toss in some greens (like spinach or kale), you’re leveling up the nutrients without messing with the flavor.
🛒 Mini Shopping List
Produce:
- Butternut squash
- Onion
- Garlic
- Fresh thyme (optional)
Pantry:
- Vegetable broth
- Coconut milk or cream
- Olive oil
- Salt & pepper
Optional Extras:
- Nutmeg or curry powder
- Croutons or crusty bread for serving
Let this soup be your go-to when you need something wholesome, soul-warming, and effortlessly delicious. What’s your favorite cozy soup add-on—grilled cheese, croutons, or a swirl of hot sauce?
Maple-Glazed Roast Turkey: Sticky-Sweet Showstopper
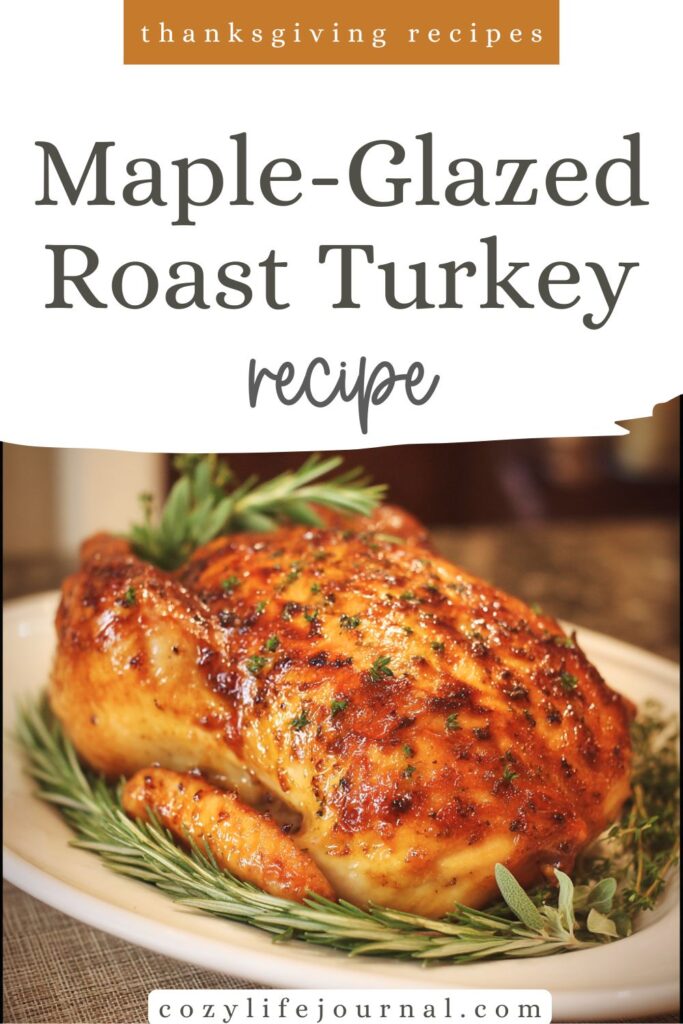
Let’s be honest: roasting a turkey can feel like signing up for culinary performance anxiety. I’ve been there—freaking out over whether it’ll be dry, bland, or (worst of all) raw in the middle. But then came this turkey. Maple-glazed. Herb-kissed. Gloriously golden. And suddenly, the bird became the belle of the Thanksgiving ball.
This recipe is a perfect mix of cozy and elevated. The maple syrup brings a gentle sweetness that caramelizes beautifully, while the fresh herbs keep things grounded and savory. Every time I pull this turkey out of the oven, I feel like a rockstar chef—even if I’ve somehow gotten syrup on the fridge handle, the floor, and my elbow (yes, that really happened).
🍁 The Recipe: Maple-Glazed Roast Turkey
Ingredients:
- 1 whole turkey (12–14 lbs), thawed
- ½ cup maple syrup
- ¼ cup unsalted butter, melted
- 2 tbsp Dijon mustard
- 1 tbsp fresh thyme, chopped
- 1 tbsp fresh rosemary, chopped
- 1 tbsp fresh sage, chopped
- Salt and pepper, to taste
- 1 large onion, quartered
- 2 carrots, peeled and chunked
- 2 celery stalks, chunked
- 2 cups chicken broth
Instructions:
- Get the Bird Ready: Remove the giblets (check both ends, trust me), and pat the turkey dry. Season generously with salt and pepper—don’t skip under the wings and in the cavity.
- Whisk the Glaze: Combine maple syrup, melted butter, Dijon mustard, and those fragrant chopped herbs. Set aside—try not to taste test too much.
- Stuff the Cavity: Fill the turkey’s center with onion, carrots, and celery. It’s not stuffing, but it’ll infuse the meat with tons of flavor.
- Prep for Roasting: Preheat oven to 325°F (165°C). Set your turkey on a rack in a roasting pan. Brush that glaze all over the bird, then pour chicken broth into the bottom of the pan.
- Into the Oven: Roast for 3–4 hours (roughly 15 minutes per pound), brushing more glaze over the skin every 30–40 minutes. Don’t skip this step—that basting is where the magic happens.
- Check for Doneness: Around the 3-hour mark, check the internal temp. It’s ready when the thickest part of the thigh hits 165°F.
- Let It Rest: Pull it out, tent it with foil, and resist the urge to carve immediately. Give it 20–30 minutes for juicy, tender meat.
🍂 Variations & Flavor Twists
- Citrus Zest: Add orange or lemon zest to the glaze for brightness.
- Spicy Kick: Stir in a teaspoon of chili flakes or a splash of hot sauce to the glaze.
- Bourbon Glaze: A splash of bourbon with the maple syrup brings a smoky, sultry flavor.
- No-Dijon? Whole grain mustard or even a bit of apple cider vinegar works in a pinch.
🧊 Storage, Prep & Make-Ahead Tips
- Make the Glaze Ahead: You can prep the glaze a day early—store it in the fridge and gently reheat.
- Leftovers: Store turkey in airtight containers for up to 4 days, or freeze slices in broth for later.
- Reheating: Use low oven heat with a splash of broth to keep things juicy.
🎒 Packing Tips
Turkey sandwiches, anyone? Pack slices with a little cranberry sauce and arugula on crusty bread. For a hot lunch, thermos it up with a little gravy or drizzle of warmed glaze.
⏳ Time-Saving Hacks
- Herb Shortcut: Use a poultry herb blend or pre-chopped herbs to save time.
- Pre-Chop Veggies: Do your mirepoix the day before and store in a zip-top bag.
- Disposable Roasting Pan: Cleanup game-changer. Just be sure it’s sturdy!
⚠️ Allergen Info & Diet Notes
- Gluten-Free: Totally safe, but check your chicken broth label.
- Dairy-Free Version: Use olive oil instead of butter in the glaze.
- Nut-Free: Yep! No nuts here.
💪 Healthy Tips & Nutrition Notes
Turkey is naturally lean protein, and the herbs bring antioxidants and bold flavor without extra fat or salt. If you’re watching sugar, cut the maple syrup back slightly and add more mustard and herbs for balance.
🛒 Mini Shopping List
Meat:
- 1 whole turkey (12–14 lbs)
Produce:
- Onion
- Carrots
- Celery
- Fresh thyme
- Fresh rosemary
- Fresh sage
Pantry/Fridge:
- Maple syrup
- Dijon mustard
- Unsalted butter (or olive oil)
- Chicken broth
- Salt & pepper
Roasting a turkey doesn’t have to be terrifying. This recipe is forgiving, flavorful, and very impressive. Whether it’s Thanksgiving or just a cozy weekend dinner party, that maple-glazed finish makes the whole house smell like the best kind of celebration.
What’s your go-to side dish to serve with roast turkey?
Sweet Potato Casserole with Marshmallow Topping: A Spoonful of Sweet Holiday Joy
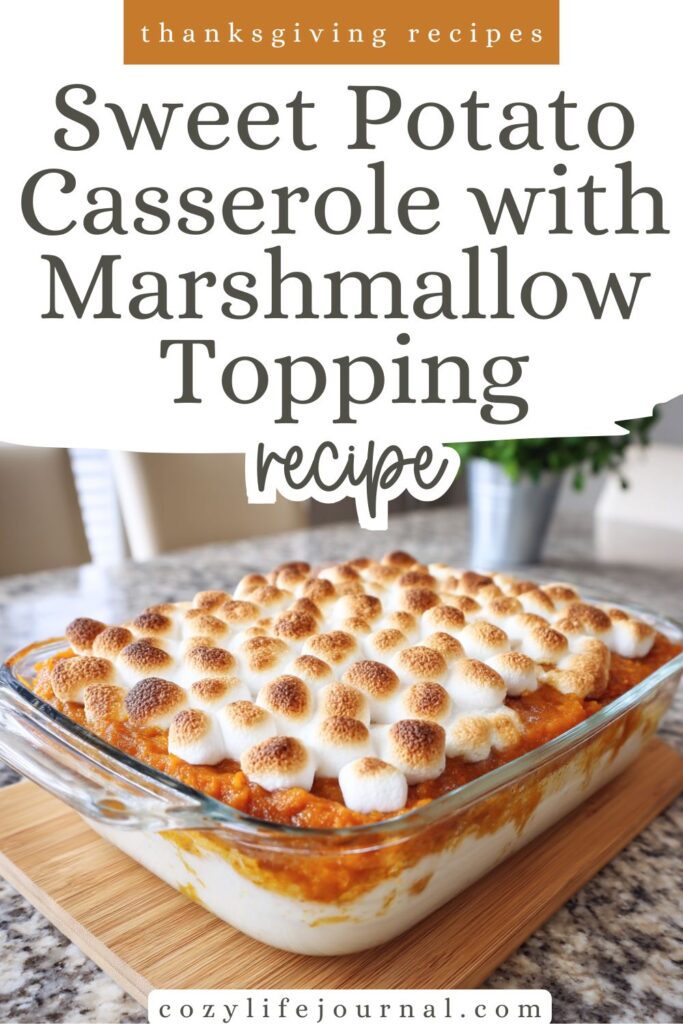
There are dishes that say they’re comforting, and then there’s sweet potato casserole—the kind with a caramel-hued swirl of spiced potatoes and a golden, gooey marshmallow topping that makes kids squeal and grown-ups sneak seconds. This one? It’s a total crowd-pleaser, straight from the heart (and, in my case, Grandma’s kitchen).
I still remember being just tall enough to peek over the counter as my grandma whipped this up every Thanksgiving. She’d give me a “don’t tell” look and hand me a few mini marshmallows before they crowned the casserole. That smell of cinnamon, nutmeg, and roasted sugar still brings me right back.
Whether it’s gracing the holiday table or showing up at a random Tuesday potluck (yes, it deserves a non-holiday moment too), this dish is always met with empty plates and full hearts.
🍠 The Recipe: Sweet Potato Casserole with Marshmallow Topping
Ingredients:
- 4 large sweet potatoes
- ½ cup brown sugar
- ¼ cup unsalted butter, melted
- ¼ cup milk
- 1 tsp vanilla extract
- ½ tsp cinnamon (or more, no judgment)
- ¼ tsp nutmeg
- ⅛ tsp ground cloves
- 1½ cups mini marshmallows
Instructions:
- Boil the Sweet Potatoes: Preheat oven to 350°F (175°C). Peel and chop sweet potatoes into chunks. Boil in a large pot of water for 15–20 minutes until fork-tender. Drain and let them cool slightly.
- Mash It Up: In a large mixing bowl, combine cooked sweet potatoes with brown sugar, melted butter, milk, vanilla, and all those lovely warming spices. Mash until smooth—either by hand or with a mixer for an extra creamy texture.
- Assemble the Casserole: Grease a 9×13-inch baking dish and spread the sweet potato mixture evenly inside. Smooth it down gently.
- Top with Marshmallows: Scatter the mini marshmallows generously across the top. Yes, it looks like a sugar snowstorm. Yes, you’re doing it right.
- Bake to Perfection: Bake for 20 minutes or until the marshmallows are puffed, golden, and begging to be devoured.
- Cool & Serve: Let it rest for a few minutes before serving—if anyone can wait that long.
✨ Variations & Twists
- Nutty Crunch: Add a pecan streusel topping under the marshmallows for texture and toasty goodness.
- Less Sweet Option: Halve the sugar and skip the marshmallows in favor of chopped, toasted nuts.
- Extra Flavor: A splash of orange juice or zest brightens everything up beautifully.
- Bourbon Boost: Stir a tablespoon of bourbon into the mash for a grown-up, smoky note.
❄️ Storage, Prep & Make-Ahead Tips
- Make Ahead: Assemble the sweet potato layer the day before and refrigerate. Add marshmallows just before baking.
- Leftovers: Store in the fridge for up to 4 days. Reheat in the oven at 325°F to keep the marshmallows from melting away completely.
- Freeze-Friendly? Yes! Freeze just the sweet potato layer (no marshmallows) in advance, and add the topping fresh when you’re ready to bake.
🎒 Packing Tips
For a potluck or family dinner: bake it in a disposable aluminum tray and reheat on-site. Just be sure to cover it loosely with foil so the marshmallows don’t stick to the lid on the way there!
⏱️ Time-Saving Hacks
- Microwave Shortcut: Poke whole sweet potatoes and microwave until soft—saves boiling time and pot cleanup.
- Pre-Spiced: Use pumpkin pie spice as a shortcut if you’re out of individual spices.
- Pre-Cut Marshmallows: Okay, kidding. Just use the minis. They’re perfect and adorable.
⚠️ Allergen Info & Diet Versions
- Dairy-Free: Sub plant-based butter and a non-dairy milk like oat or almond.
- Nut-Free: This version is naturally nut-free—just skip any nut topping ideas.
- Vegan: Use vegan marshmallows (like Dandies) and plant-based butter/milk to make it completely vegan.
💡 Healthy-ish Tips
- Swap half the butter for plain Greek yogurt or coconut cream for added creaminess with a nutrient bump.
- Cut sugar to ¼ cup and rely more on the natural sweetness of the potatoes.
- Top half with marshmallows, half with pecans—something for everyone!
🛒 Mini Shopping List
Produce:
- 4 large sweet potatoes
Fridge/Pantry:
- Unsalted butter
- Milk (dairy or non-dairy)
- Brown sugar
- Vanilla extract
- Ground cinnamon, nutmeg, cloves
- Mini marshmallows
Optional Extras:
- Chopped pecans
- Orange zest
- Bourbon
This casserole is proof that sometimes the simplest things—spiced potatoes and toasted marshmallows—bring the biggest smiles. Whether you’re passing it down the table or sneaking forkfuls out of the fridge the next morning (guilty), it’s always worth making.
What’s your sweet potato casserole style—team marshmallow, team pecan, or both?
Cranberry Orange Sauce: The Brightest Bite on the Table
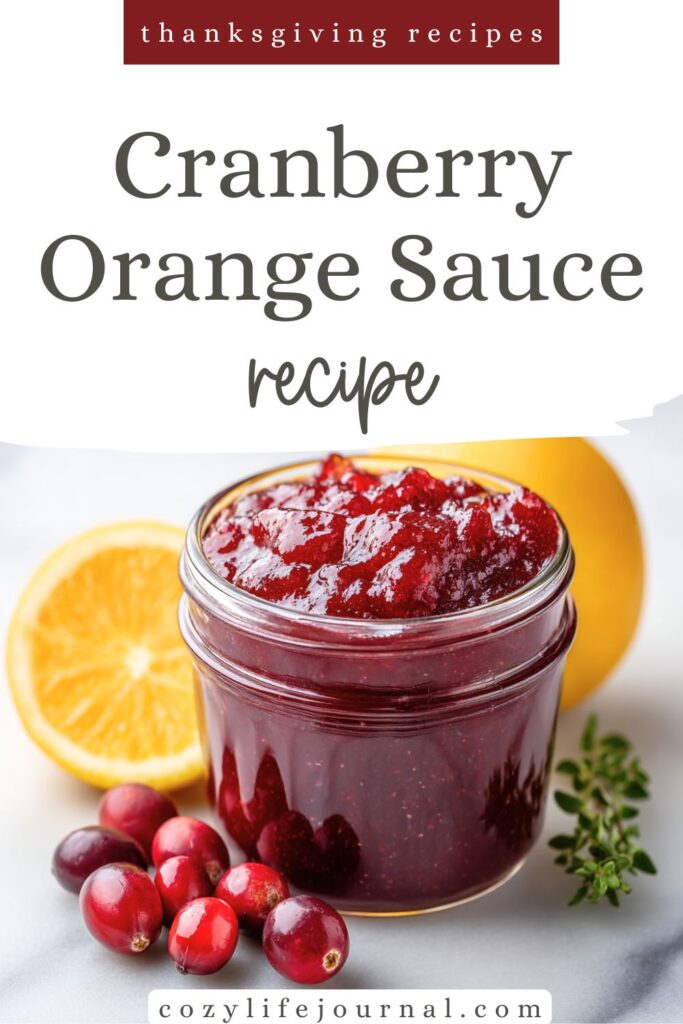
I’ll admit it—I used to think cranberry sauce came pre-approved in can-shaped slices. It jiggled, it wobbled, and honestly, it never called my name. But then I tried the real thing: bubbling cranberries, fresh orange juice, and that citrusy zest that makes the whole kitchen smell like holiday magic. Game. Changer.
This cranberry orange sauce is tart, sweet, and has just the right amount of zing. It takes 15 minutes tops, and the payoff? A sauce that actually earns a spot next to your beloved stuffing and turkey. It’s bright, fresh, and never too sweet—just enough to cut through the richness of a holiday meal and leave you reaching for seconds (or spooning it straight from the jar, no judgment).
🍊 The Recipe: Cranberry Orange Sauce
Ingredients:
- 12 oz fresh cranberries
- ½ cup fresh orange juice (from about 2 oranges)
- ½ cup granulated sugar (adjust to taste)
- Zest of 1 orange
Instructions:
- Simmer the Good Stuff: In a medium saucepan, stir together the cranberries, orange juice, sugar, and zest.
- Let It Bubble: Bring to a simmer over medium heat. Cook for 10–15 minutes, stirring now and then, until the cranberries burst and the sauce thickens naturally.
- Taste & Adjust: Give it a taste—if it’s too tart, stir in a bit more sugar and let it cook a few more minutes.
- Cool It Down: Take it off the heat and let it cool completely. It’ll thicken as it chills.
- Serve: Serve it room temp or chilled—both are fabulous.
🍒 Variations & Flavor Twists
- Ginger Twist: Add a teaspoon of freshly grated ginger for a warm, spicy note.
- Spiced Version: A cinnamon stick or a pinch of allspice gives it a cozy holiday vibe.
- Boozy Boost: A splash of Grand Marnier or brandy takes it over the top.
- Berry Blend: Mix in chopped dried figs, cherries, or a handful of raspberries for added texture and flavor.
❄️ Storage, Prep & Make-Ahead Tips
- Make Ahead: This sauce is a dream for planners. Make it up to a week ahead—it actually tastes better after a day or two.
- Fridge Life: Store in a sealed container for up to 10 days.
- Freezer-Friendly: Yes! Freeze in small portions for an instant flavor boost whenever you need it.
🎒 Packing Tips
Perfect for travel: pack it in a mason jar or sealed container. Bring it chilled and serve straight from the fridge or let it warm slightly to room temp.
⏱️ Time-Saving Hacks
- Use Bottled Juice: Fresh orange juice is best, but bottled works in a pinch.
- Zest First: Always zest your orange before juicing it—it’s way easier that way.
- Batch It: Double the recipe and use leftovers in yogurt bowls, turkey sandwiches, or on toast.
⚠️ Allergen Info & Diet Versions
- Gluten-Free: Yep.
- Vegan: 100% plant-based.
- Nut-Free: Naturally.
💡 Healthy Tips & Nutrition Notes
Cranberries are loaded with antioxidants, and orange zest brings vitamin C and brightness. You can use less sugar or swap in honey or maple syrup for a different twist.
🛒 Mini Shopping List
Produce:
- Fresh cranberries
- Oranges (2, for juice + zest)
Pantry:
- Granulated sugar
Optional Extras:
- Fresh ginger
- Cinnamon stick
- Maple syrup or honey
- Grand Marnier or brandy
Cranberry sauce made from scratch is one of those little things that feels way fancier than it is—and totally transforms the plate. Whether you’re team smooth, chunky, or somewhere in between, this zesty number is here to upgrade your holiday table for good.
What do you spoon your cranberry sauce on first—turkey, stuffing, or straight from the fridge with leftover pie?
Herb Stuffing with Sausage: The Real Star of the Holiday Table
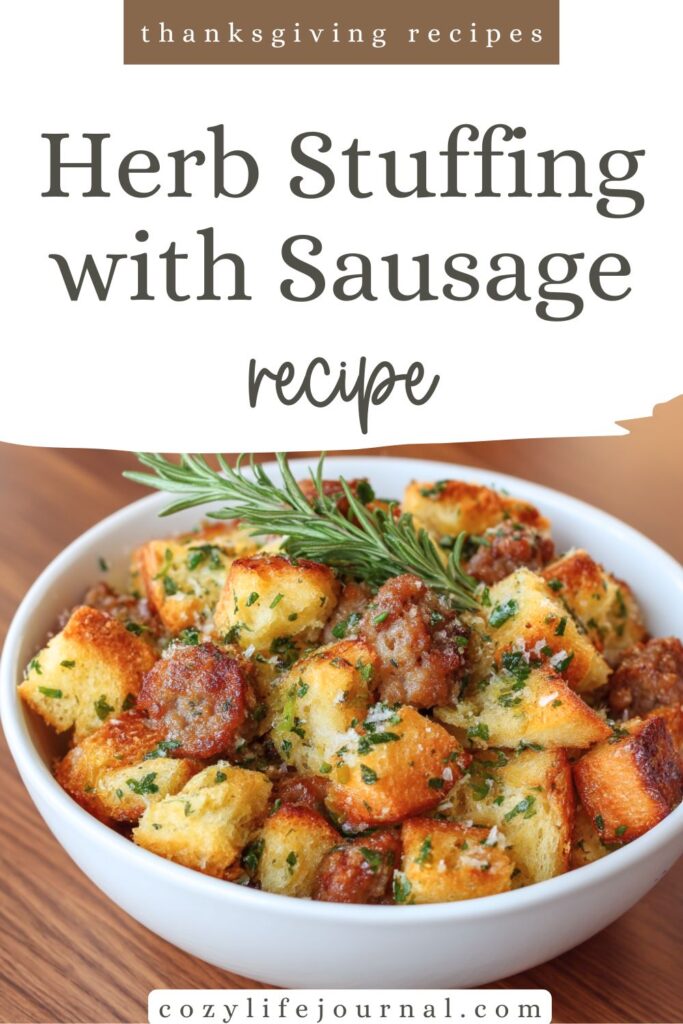
Let’s just say it—I make this stuffing for the stuffing. The turkey is fine, the cranberry sauce is cute, but this? This is the dish I’m hovering over in the kitchen, “taste testing” with a fork every time someone turns their back.
There’s something about the mix of rustic bread cubes, golden sausage bits, and those fresh, woodsy herbs—sage, thyme, rosemary—that makes every bite cozy and craveable. The top gets delightfully crisp, while the inside stays soft and savory. And the sausage? That’s the flavor bomb that takes it from “meh” to “where has this been all my life?”
Whether you’re stuffing your bird or just baking it up on the side (team casserole dish forever), this recipe is a guaranteed win.
🍞 The Recipe: Herb Stuffing with Sausage
Ingredients:
- 1 loaf day-old crusty bread, cut into 1-inch cubes
- 1 lb Italian sausage, casings removed
- 1 onion, chopped
- 2 celery stalks, chopped
- 2 tbsp unsalted butter
- 2 cups chicken broth
- 2 tbsp fresh parsley, chopped
- 1 tbsp fresh sage, chopped
- 1 tbsp fresh thyme, chopped
- 1 tbsp fresh rosemary, chopped
- Salt and pepper, to taste
Instructions:
- Dry the Bread: Spread bread cubes on a baking sheet and let them sit out overnight, or bake them at 300°F (150°C) for 15–20 minutes until crisp, tossing halfway through.
- Cook the Sausage: In a large skillet over medium heat, cook the sausage until browned, breaking it up as it cooks. Remove and set aside.
- Sauté the Veggies: In the same skillet, melt the butter. Add onion and celery and sauté for 5–7 minutes until tender and fragrant.
- Mix It All Together: In a big mixing bowl, combine toasted bread, sausage, veggies, parsley, sage, thyme, and rosemary. Season with salt and pepper. Gradually pour in the broth, tossing gently, until the bread is moist but not mushy.
- Bake: Preheat oven to 350°F (175°C). Transfer stuffing to a greased baking dish. Cover with foil and bake for 30 minutes. Remove foil and bake an additional 10–15 minutes to crisp the top.
- Serve: Let it rest a few minutes before serving. (If you make it to the table without nibbling, you’re stronger than I am.)
🌿 Variations & Twists
- Add Apples: Diced, sautéed apples add a touch of sweetness that plays beautifully with the sausage.
- Go Nutty: Toasted walnuts or pecans bring crunch and richness.
- Cheesy Moment: Stir in a handful of grated Parmesan or Gruyère before baking for an extra savory twist.
- Mushroom Magic: Add sautéed mushrooms for an earthy, umami boost.
❄️ Storage, Prep & Make-Ahead Tips
- Make-Ahead: Prep the whole stuffing the day before, store covered in the fridge, and bake fresh.
- Fridge Life: Keeps for up to 4 days. Reheat in the oven or microwave with a splash of broth to rehydrate.
- Freezer-Friendly: Freeze pre-baked or baked stuffing. Thaw overnight in the fridge and reheat at 325°F until warmed through.
🧺 Packing Tips
Great for leftovers: Pack into individual containers with a slice of turkey and cranberry sauce for the world’s best post-holiday lunchbox.
⏱️ Time-Saving Hacks
- Pre-Cut Bread Cubes: Many bakeries and stores sell pre-cut, day-old bread—saves time and toasting!
- Use Poultry Seasoning: In a pinch, sub in 1–2 teaspoons of poultry seasoning if you don’t have fresh herbs.
- One-Skillet Shortcut: If your skillet is oven-safe, mix and bake everything right in there.
⚠️ Allergen Info & Diet Options
- Dairy-Free: Swap butter for olive oil or plant-based butter.
- Gluten-Free: Use a GF loaf (make sure it’s sturdy!) and check your sausage and broth labels.
- Nut-Free: Totally nut-free as-is—just skip the optional add-ins.
💡 Healthy Tips & Nutrition Notes
Use whole-grain bread for a fiber boost, and lean chicken or turkey sausage if you want to lighten it up. Add chopped kale or spinach for a stealthy veggie addition.
🛒 Mini Shopping List
Produce:
- Onion
- Celery
- Fresh parsley
- Fresh sage
- Fresh thyme
- Fresh rosemary
Bakery/Meat:
- Day-old crusty bread
- Italian sausage (1 lb)
Pantry/Fridge:
- Chicken broth
- Unsalted butter
- Salt & pepper
Optional Extras:
- Apples
- Toasted nuts
- Mushrooms
- Parmesan cheese
This stuffing is the dish you hope no one else takes seconds of—because you’re already planning to eat the leftovers cold, straight from the fridge. And if you’re lucky enough to get a crunchy corner piece? Chef’s kiss.
Pumpkin Pie with Spiced Whipped Cream: The Hug-in-a-Slice Dessert
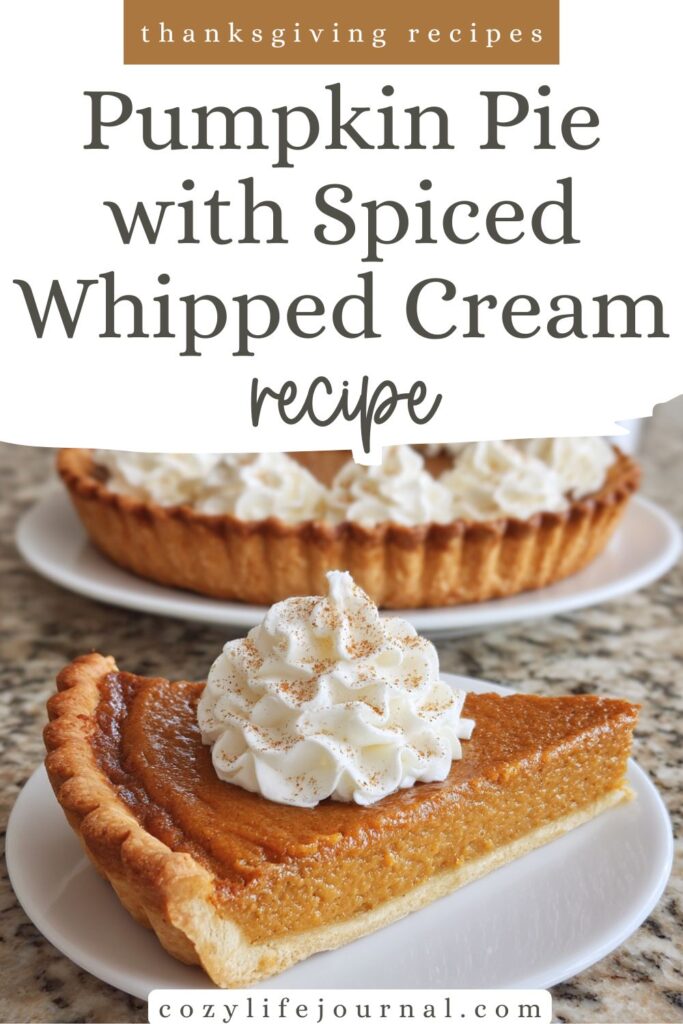
Pumpkin pie is the unofficial mascot of fall. It’s the scent of cinnamon wafting through the kitchen, the golden-orange filling that jiggles just a little when you slice it, and the way everyone magically finds room for “just a sliver” after a heavy meal. But let’s not stop at tradition—this version takes it up a notch with spiced whipped cream that’s fluffy, fragrant, and (let’s be real) completely irresistible.
Every bite is like wrapping up in your favorite flannel blanket: warm, cozy, and spiced just right. It’s a little sweet, a little nostalgic, and 100% the reason your guests will hover by the dessert table.
🥧 The Recipe: Pumpkin Pie with Spiced Whipped Cream
Ingredients:
For the Pie:
- 1 pie crust (store-bought or homemade)
- 1 can (15 oz) pumpkin puree
- 1 cup evaporated milk
- ¾ cup granulated sugar
- 2 large eggs
- 1 tsp cinnamon
- ½ tsp nutmeg
- ¼ tsp ground cloves
- ¼ tsp ground ginger
- ¼ tsp salt
For the Spiced Whipped Cream:
- 1 cup heavy cream
- 2 tbsp powdered sugar
- ½ tsp cinnamon
- ¼ tsp nutmeg
👩🍳 Instructions:
- Preheat the Oven: Set it to 425°F (220°C) and prep your pie dish.
- Make the Filling: In a large bowl, whisk together pumpkin puree, evaporated milk, sugar, eggs, and all those warm spices until silky smooth.
- Prep the Crust: Roll out the pie dough and place it in a 9-inch pie dish. Crimp the edges like a pro (or rustic is fine too—this isn’t pie show choir).
- Bake the Pie: Pour the filling into the crust. Bake at 425°F for 15 minutes, then reduce the heat to 350°F (175°C) and bake another 40–50 minutes. You’re looking for a firm set and a clean toothpick from the center.
- Cool Down: Let the pie cool completely on a wire rack. This helps it firm up and makes slicing easier.
- Whip the Cream: In a cold mixing bowl, beat the heavy cream, powdered sugar, cinnamon, and nutmeg until soft peaks form. Try not to eat it all before the pie is ready.
- Serve: Slice, dollop generously, and bask in the “you made this?!” compliments.
🍂 Variations & Flavor Twists
- Maple Upgrade: Swap half the sugar for maple syrup for deeper autumn vibes.
- Boozy Cream: Add a splash of bourbon or dark rum to the whipped cream for a grown-up twist.
- Gingersnap Crust: Sub the pie crust for a gingersnap cookie crust for added spice and crunch.
- Extra-Spiced: Add a pinch of cardamom or black pepper for a bold, chai-like flavor.
❄️ Storage, Prep & Make-Ahead Tips
- Make Ahead: Bake the pie a day or two ahead—pumpkin pie loves a good chill.
- Storage: Keep it covered in the fridge for up to 4 days. The whipped cream is best fresh but can be re-whipped if needed.
- Freeze: Pumpkin pie freezes beautifully! Wrap tightly and freeze for up to a month. Thaw overnight in the fridge.
🧺 Packing Tips
Traveling with pie? Let it cool completely, then wrap the dish in plastic wrap and foil. Transport whipped cream in a separate container and dollop just before serving. Or, pipe it on once you arrive—very fancy.
⏱️ Time-Saving Hacks
- Premade Crust: Store-bought crust is your friend—just go for a good-quality one.
- No-Mixer Whip: Use a mason jar to shake up cream if you’re without a mixer (or feeling like an arm workout).
- Spice Mix Shortcut: Use pumpkin pie spice if you don’t have all the individual spices on hand.
⚠️ Allergen Info & Diet Notes
- Dairy-Free: Use coconut cream for the whip and a dairy-free evaporated milk substitute.
- Gluten-Free: Use a gluten-free pie crust or go crustless (yes, it works!).
- Nut-Free: Naturally nut-free—just check your pie crust ingredients if store-bought.
💡 Healthy Tips & Nutrition Notes
Cut the sugar slightly if you like it more subtly sweet. Use low-fat evaporated milk, and top with Greek yogurt instead of whipped cream for a lighter finish (or split the whipped cream with yogurt for a tangy twist).
🛒 Mini Shopping List
Pantry:
- Pumpkin puree
- Evaporated milk
- Granulated sugar
- Powdered sugar
- Cinnamon, nutmeg, cloves, ginger, salt
- Pie crust
Fridge:
- Eggs
- Heavy cream
Optional Extras:
- Maple syrup
- Bourbon
- Gingersnap cookies (for alternate crust)
Pumpkin pie is tradition—but that spiced whipped cream? That’s your signature move. It’s a little fancy, a lot tasty, and guaranteed to become a family favorite.
So… are you a whipped cream on the side person or do you go full cloud-on-top for each slice?
7. Roasted Brussels Sprouts with Bacon – Thanksgiving Recipes
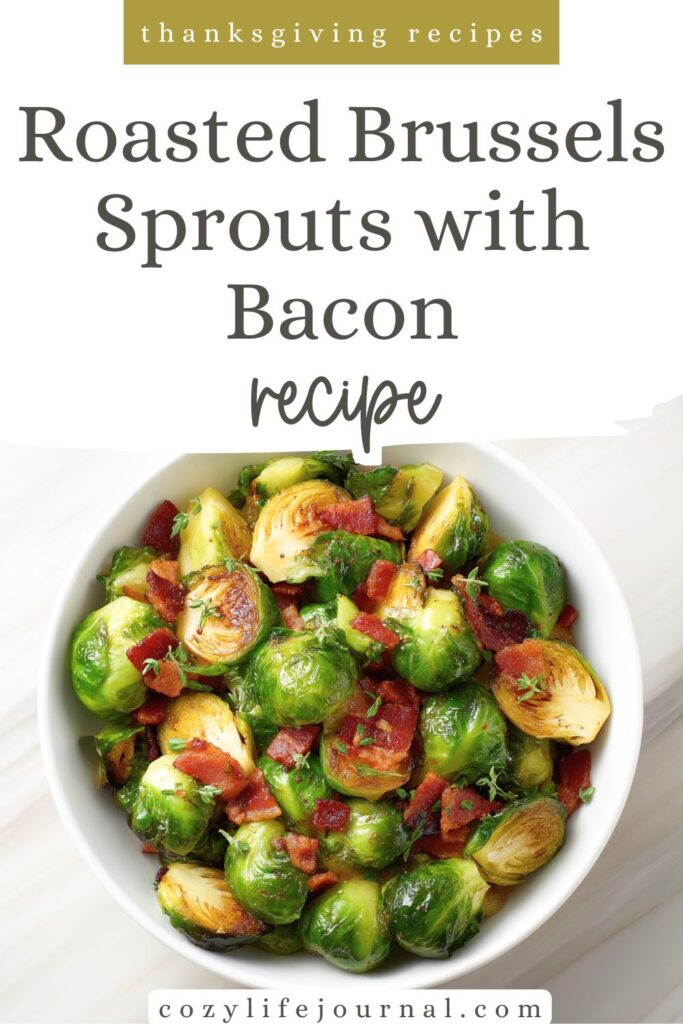
Once upon a time, I was firmly in the “no thanks” camp when it came to Brussels sprouts. They were soggy. They were bitter. They were… punishment on a plate. Then one day, I roasted them. With bacon. And suddenly, the humble sprout became the life of the dinner party.
This dish is a perfect blend of crispy edges, caramelized bits, smoky bacon, and just enough salt to make you forget you’re eating something green. The oven transforms Brussels sprouts into golden little flavor bombs, and the bacon? Well, the bacon does what bacon always does: makes everything better.
Even my brother—who once called Brussels sprouts “leafy rocks”—asks for seconds now. Victory.
🥓 The Recipe: Roasted Brussels Sprouts with Bacon
Ingredients:
- 1 lb Brussels sprouts, trimmed and halved
- 4 slices bacon, chopped
- 2 tbsp olive oil
- 1 tbsp balsamic vinegar (optional, for a tangy finish)
- Salt and pepper, to taste
🔥 Instructions:
- Preheat the Oven: Crank it up to 400°F (200°C).
- Prep the Veggies & Bacon: Trim the sprouts and cut them in half. Chop the bacon into bite-sized pieces.
- Toss It All Together: In a big bowl, toss the Brussels sprouts with olive oil, salt, and pepper. Stir in the bacon pieces until everything’s well-coated and cozy.
- Roast Like a Pro: Spread the mixture out on a parchment-lined baking sheet. Important: don’t overcrowd the pan—give them room to crisp! Roast for 25–30 minutes, giving everything a good stir halfway through for even browning.
- Optional Balsamic Boost: Right before serving, drizzle with balsamic vinegar and toss to coat for a tangy-sweet finish.
- Serve Hot: Plate it up while it’s sizzling—crispy bits and all.
🥄 Variations & Flavor Twists
- Add Garlic: Toss in a few smashed garlic cloves before roasting for extra aroma.
- Nutty Crunch: Sprinkle toasted walnuts or pecans over the top just before serving.
- Cheesy Upgrade: A little grated Parmesan or crumbled feta makes this dish next-level.
- Sweet & Savory: Add a drizzle of maple syrup during the last 5 minutes of roasting.
❄️ Storage, Prep & Make-Ahead Tips
- Make Ahead: Trim and halve the Brussels up to 2 days in advance. Store in a sealed bag in the fridge.
- Leftovers: Store in the fridge for up to 3 days. Reheat in the oven or air fryer to bring back that crispy magic.
- Meal Prep Friendly: These reheat well, making them a great side for weekday lunches.
🧺 Packing Tips
Pack warm in a thermos or keep separate in a sealed container to reheat later. Keep balsamic or cheese toppings separate until just before eating.
⏱️ Time-Saving Hacks
- Pre-Cut Sprouts: Many grocery stores sell Brussels sprouts already trimmed and halved—total game-changer.
- Sheet Pan Efficiency: Roast them alongside your main dish to save oven space and time.
⚠️ Allergen Info & Diet Options
- Gluten-Free: Yes! Naturally.
- Dairy-Free: All clear—unless you add cheese.
- Low-Carb/Keto-Friendly: Totally keto-approved.
💡 Healthy Tips & Nutrition Notes
Brussels sprouts are loaded with fiber, vitamin C, and antioxidants. Pairing them with bacon gets even picky eaters on board, and a balsamic finish balances the richness with acidity. Win-win.
🛒 Mini Shopping List
Produce:
- Brussels sprouts
Meat:
- Bacon
Pantry:
- Olive oil
- Salt & pepper
- Balsamic vinegar (optional)
Optional Extras:
- Garlic
- Maple syrup
- Nuts or cheese
Roasted Brussels sprouts with bacon are that rare dish that bridges the gap between veggie-averse and flavor-obsessed. Crisp, smoky, salty-sweet—it’s the side that gets scraped off the pan before it even hits the table.
So tell me… are you Team Crispy Leaf Bits or Team Tender Center?
Honey-Glazed Carrots: The Unsung Hero of the Holiday Table

Some sides are showy. Others are cozy. And then there are honey-glazed carrots—quietly charming, gorgeously glossy, and surprisingly addictive. These little guys bring just the right pop of color and sweetness to the plate, and while they may look innocent, they will get eaten first. Every time.
In my family, the joke is that I get a little heavy-handed with the honey. Guilty. But when that golden glaze melts into tender carrots with just a hint of butter? Totally worth it. And let’s not pretend we don’t all aim for that parsley-sprinkled, Instagram-ready finish—it’s half the fun.
Perfect alongside all the heavy hitters on your holiday menu, these carrots offer a light, sweet balance. Plus, they come together fast. Like, real fast.
🥕 The Recipe: Honey-Glazed Carrots
Ingredients:
- 1 lb baby carrots (or sliced large carrots)
- 2 tbsp honey
- 2 tbsp unsalted butter
- 1 tbsp fresh parsley, chopped (for garnish)
- Salt and pepper, to taste
👩🍳 Instructions:
- Boil the Carrots: Bring a pot of salted water to a boil. Add carrots and cook for 5–8 minutes until tender but still with a bit of bite. Drain and set aside.
- Make the Glaze: In a large skillet, melt the butter over medium heat. Stir in the honey and let it bubble for 1–2 minutes until glossy and slightly thickened.
- Glaze the Carrots: Add the drained carrots to the skillet and toss to coat. Cook for another 2–3 minutes, stirring gently, until they’re fully glazed and gleaming.
- Finish & Serve: Season with salt and pepper to taste. Sprinkle with chopped parsley just before serving for that final fresh pop.
🍯 Variations & Flavor Twists
- Spice It Up: Add a pinch of cinnamon or cayenne to the glaze for warmth or heat.
- Citrus Note: Stir in a splash of orange juice or zest with the honey for brightness.
- Maple Swap: Sub maple syrup for honey for an earthy twist.
- Garlic Glaze: Sauté a little minced garlic in the butter before adding the honey for a savory-sweet balance.
❄️ Storage, Prep & Make-Ahead Tips
- Prep Ahead: Boil the carrots earlier in the day and store in the fridge. Glaze just before serving.
- Leftovers: Store in the fridge for up to 3 days. Reheat gently on the stovetop or in the microwave.
- Freeze? Not ideal. Carrots can get a little soggy when thawed.
🧺 Packing Tips
Great for potlucks or dinners on the go: transport in a covered dish and reheat on-site. Add fresh parsley right before serving so it stays bright and vibrant.
⏱️ Time-Saving Hacks
- Use Baby Carrots: Already peeled and perfectly bite-sized.
- Microwave Boil: Steam the carrots in the microwave to cut down on stovetop time.
- Glaze in Advance: Make the honey-butter glaze ahead and just warm it up when you’re ready to toss the carrots in.
⚠️ Allergen Info & Diet Notes
- Gluten-Free: Naturally!
- Vegetarian-Friendly: Totally (just check the butter if using store-bought).
- Vegan: Use a plant-based butter and swap in maple syrup or agave for the honey.
💡 Healthy Tips & Nutrition Notes
Carrots bring fiber, beta-carotene, and a subtle natural sweetness. You can cut the butter in half or use a lighter honey-to-butter ratio if you’re watching fats or sugars.
🛒 Mini Shopping List
Produce:
- Baby carrots or large carrots
- Fresh parsley
Pantry/Fridge:
- Honey
- Unsalted butter
- Salt & pepper
Optional Extras:
- Cinnamon or cayenne
- Orange zest or juice
- Maple syrup
These honey-glazed carrots are proof that simple doesn’t mean boring. They’re sweet, buttery, and impossible to stop “taste testing” straight from the pan.
So—are you team baby carrot, or do you go full rustic with sliced heirlooms and rainbow carrots?
Garlic Mashed Potatoes: Comfort in a Bowl (With a Little Extra Love)
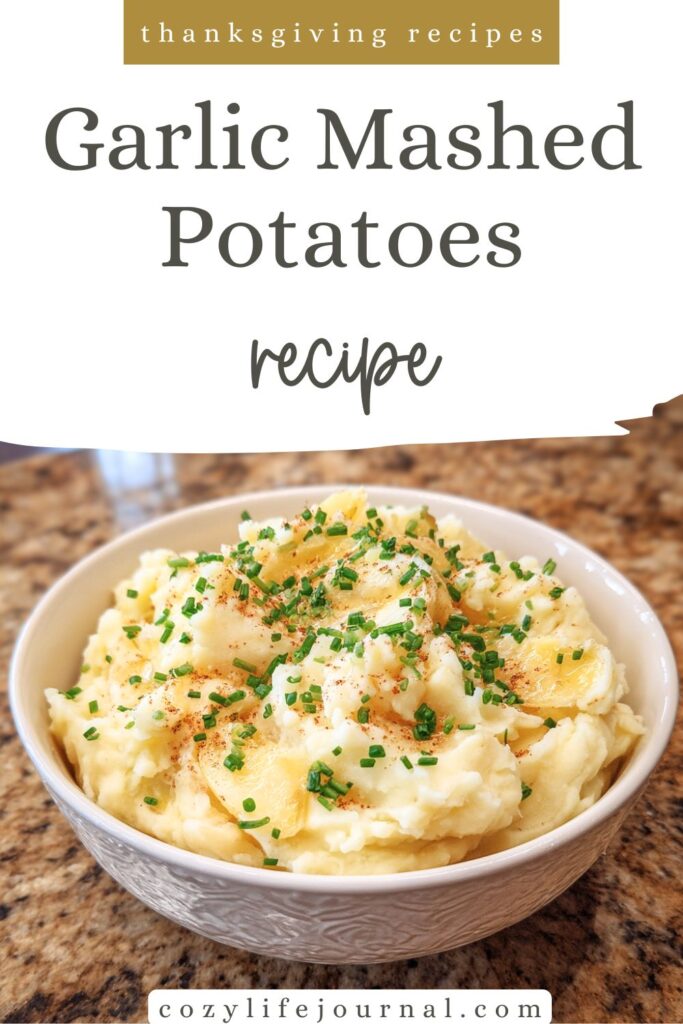
Mashed potatoes are the food equivalent of a weighted blanket. Add roasted garlic to the mix and you’re basically spooning up happiness. There’s just something about that soft, sweet garlic mingling with buttery potatoes that makes everything feel right in the world—even if you’re eating them straight from the pot while hiding from your relatives in the kitchen. (No judgment. I’ve been there.)
This is the kind of side dish that earns nods of approval with the first bite—and maybe even a little elbow nudge from someone saying, “You made these?” They’re rich, creamy, and perfectly rustic (especially if you embrace a few lumps as part of the charm).
🧄 The Recipe: Garlic Mashed Potatoes
Ingredients:
- 4 large russet potatoes, peeled and quartered
- 4 cloves garlic
- ½ cup unsalted butter
- ½ cup heavy cream or milk (warmed)
- Salt and pepper, to taste
- Fresh chives, chopped (optional for garnish)
👩🍳 Instructions:
- Roast the Garlic: Preheat your oven to 400°F (200°C). Wrap the garlic cloves in foil and roast for 20 minutes until soft, golden, and spreadable like butter.
- Boil the Potatoes: Meanwhile, place your peeled and quartered potatoes in a pot of salted water. Bring to a boil and cook for 15–20 minutes until fork-tender.
- Mash It Up: Drain the potatoes and return them to the pot. Squeeze the roasted garlic out of its papery shell and into the potatoes. Mash with a potato masher or hand mixer until just smooth.
- Creamy Finish: Slowly add the butter and warm cream (don’t skip warming it—cold cream makes sad potatoes), and stir until creamy. Go easy on the mixing—overmixing can turn your potatoes into paste.
- Season & Serve: Season generously with salt and pepper. Top with a sprinkle of fresh chives if you’re feeling fancy.
🥄 Variations & Flavor Twists
- Cheesy Dream: Stir in a handful of shredded cheddar or Parmesan.
- Herb It Up: Mix in chopped parsley, thyme, or rosemary.
- Tangy Twist: Add a dollop of sour cream or cream cheese for extra richness.
- Make It Vegan: Use plant-based butter and a non-dairy milk like oat or almond.
❄️ Storage, Prep & Make-Ahead Tips
- Make Ahead: Mashed potatoes hold beautifully. Reheat with a splash of cream and a pat of butter to bring them back to life.
- Fridge Life: Keeps for up to 4 days, tightly covered.
- Freezer Friendly: Yes! Freeze in portions and reheat with added cream.
🧺 Packing Tips
Perfect for a potluck or Thanksgiving dinner. Pack warm in a heat-safe dish, and bring extra roasted garlic butter to drizzle on top just before serving. Hero move.
⏱️ Time-Saving Hacks
- Microwave the Garlic: In a pinch, microwave garlic cloves (peeled, covered with plastic wrap and a drizzle of oil) for 2 minutes instead of roasting.
- Use Yukon Golds: No need to peel—just scrub and go for a more rustic mash.
- Pre-Peel & Soak: Peel and chop potatoes the night before and keep them in cold water in the fridge.
⚠️ Allergen Info & Diet Versions
- Gluten-Free: Naturally.
- Dairy-Free Option: Use non-dairy milk and butter substitutes.
- Vegan-Friendly: Totally doable with plant-based swaps.
💡 Healthy Tips & Nutrition Notes
Lighten it up by swapping half the butter for olive oil or Greek yogurt. Using milk instead of cream also trims some richness while still keeping it smooth.
🛒 Mini Shopping List
Produce:
- Russet potatoes
- Garlic
- Fresh chives (optional)
Fridge/Pantry:
- Unsalted butter
- Heavy cream or milk
- Salt & pepper
Optional Extras:
- Cheese
- Fresh herbs
- Sour cream or cream cheese
Garlic mashed potatoes are proof that sometimes the simplest things bring the biggest comfort. They’re not just a side—they’re a warm hug on a plate.
So—do you prefer yours ultra-smooth or with a few hearty “rustic” bits left in for texture?
Green Bean Casserole: The Crunchy-Topped Classic That Never Fails
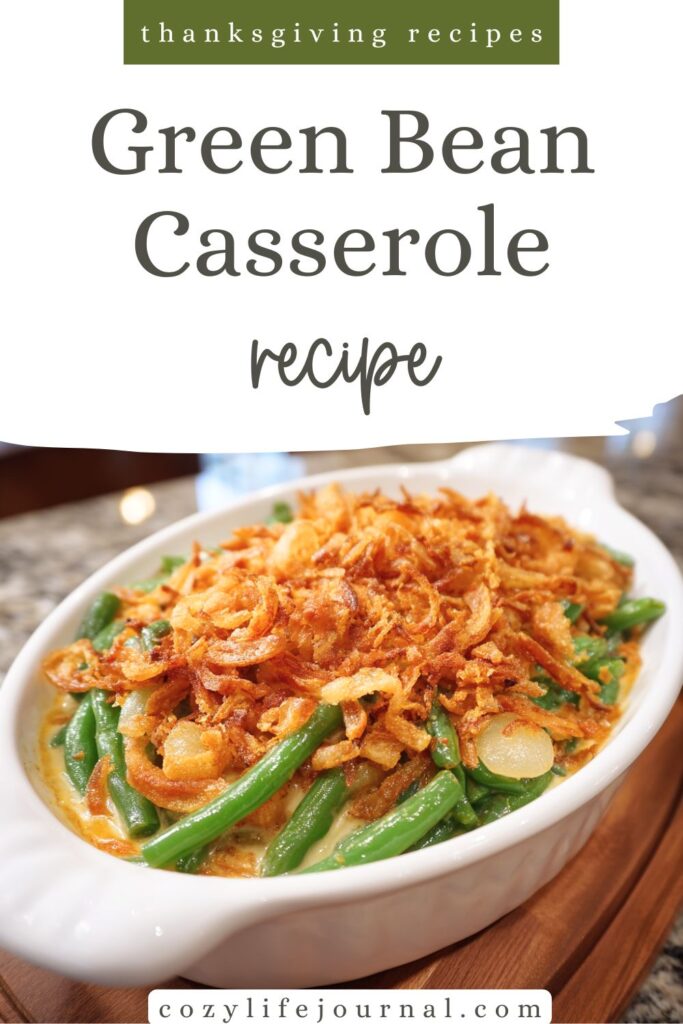
If you’ve ever found yourself “taste testing” half the fried onions before they hit the casserole dish… you’re among friends here. This green bean casserole is a holiday table must-have—creamy, comforting, and crowned with those golden, crackly onion bits that somehow steal the show every time.
For me, this dish is wrapped up in a blur of holiday memories—crowded kitchens, cousins sneaking spoonfuls from the oven, and that one uncle who swears it’s not Thanksgiving without this exact casserole. And honestly? He’s not wrong.
Whether you go traditional or add your own little twist, this dish delivers that perfect mix of soft green beans, velvety mushroom sauce, and crispy crunch in every bite. It’s retro in the best possible way.
🥄 The Recipe: Classic Green Bean Casserole
Ingredients:
- 4 cups fresh green beans (or frozen, thawed)
- 1 can (10.5 oz) cream of mushroom soup
- ½ cup milk
- 1 cup crispy fried onions
- Salt and pepper, to taste
- ½ tsp soy sauce (optional but adds a savory depth)
👩🍳 Instructions:
- Preheat the Oven: Set to 350°F (175°C) and grease your casserole dish.
- Prep the Green Beans:
Fresh: Blanch in boiling salted water for 4–5 minutes until bright and tender-crisp. Drain and set aside.
Frozen: Thaw and drain well—no need to cook.
- Mix the Base: In a large bowl, stir together the cream of mushroom soup, milk, soy sauce (if using), salt, and pepper. Fold in the green beans and half the fried onions.
- Bake the Casserole: Transfer to the prepared dish and bake uncovered for 25 minutes.
- Add the Crunch: Sprinkle the remaining fried onions on top and bake for 5–10 more minutes, until the top is golden and irresistible.
- Cool & Serve: Let it sit for a few minutes before serving—it’s hot and bubbly straight from the oven!
🧅 Variations & Flavor Twists
- Homemade Twist: Swap the canned soup for a homemade mushroom cream sauce.
- Cheesy Love: Stir in a handful of shredded cheddar or Gruyère for added richness.
- Garlic Boost: Add a clove or two of minced garlic to the mix.
- Spicy Version: A few dashes of hot sauce or a sprinkle of red pepper flakes give it a gentle kick.
❄️ Storage, Prep & Make-Ahead Tips
- Make Ahead: Assemble everything except the fried onion topping and refrigerate overnight. Add onions just before baking.
- Leftovers: Keep in the fridge for up to 4 days. Reheat in the oven or microwave.
- Freezing: Not ideal—the crispy topping loses its charm. But the base can be frozen and topped fresh later.
🧺 Packing Tips
Transporting this to dinner? Bake it in a disposable foil tray, then top and finish baking at your destination for max crunch. Keep extra fried onions in a separate container to avoid sogginess in transit.
⏱️ Time-Saving Hacks
- Use Frozen Beans: No blanching needed—just thaw and go.
- Microwave Option: In a real pinch, this whole dish can be assembled and microwaved in 10–12 minutes (but the oven finish makes a big difference).
- Soup Shortcut: Add a splash of broth to canned soup for a creamier, looser texture if you prefer it less thick.
⚠️ Allergen Info & Diet Notes
- Vegetarian-Friendly: Yes! Just double-check the fried onion brand and soup for any hidden animal products.
- Gluten-Free: Use gluten-free cream of mushroom soup and certified GF fried onions.
- Dairy-Free Option: Sub in a non-dairy milk and use a DF mushroom soup (or make your own).
💡 Healthy Tips & Nutrition Notes
- Lighten It Up: Use low-sodium soup and milk. You can also sub half the fried onions with toasted almond slivers for crunch without all the oil.
- Extra Veg: Toss in some sautéed mushrooms, shallots, or even chopped spinach for added nutrients.
🛒 Mini Shopping List
Produce:
- Fresh green beans (or frozen)
Pantry:
- Cream of mushroom soup
- Milk
- Crispy fried onions
- Soy sauce (optional)
- Salt & pepper
Optional Extras:
- Cheese
- Fresh garlic
- Hot sauce
Green bean casserole is the ultimate “don’t mess with it, but also maybe try adding cheese” kind of dish. It’s classic, comforting, and always one of the first sides to vanish.
So tell me—do you actually measure the fried onions, or do you just pour until your soul says “enough”?
Apple Pecan Salad with Maple Dressing: A Fresh Bite of Fall
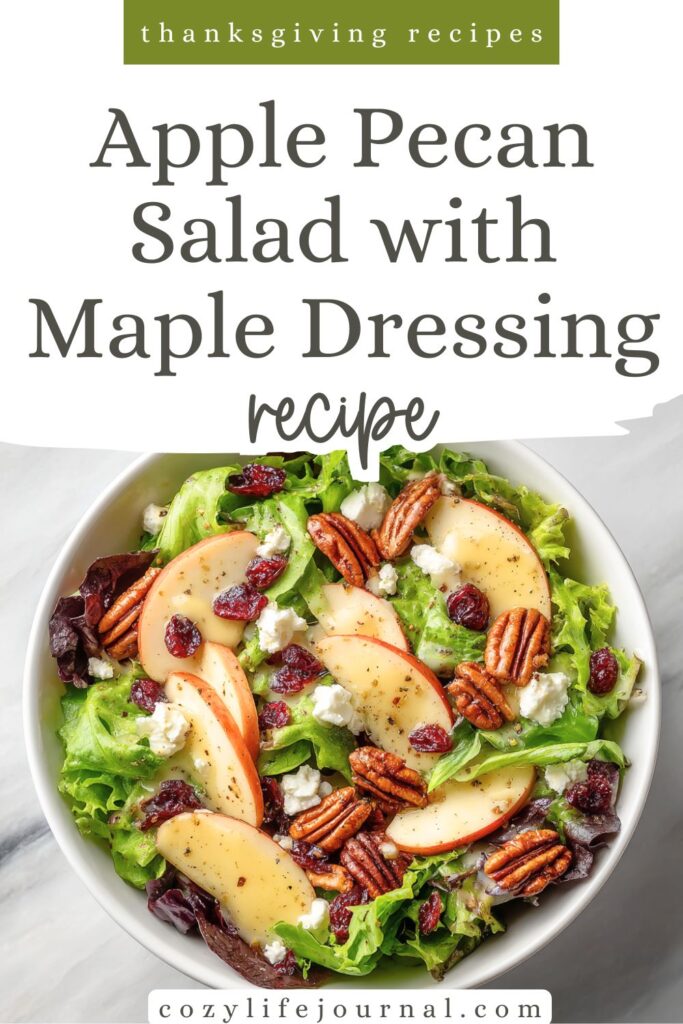
Let’s be honest—holiday tables get heavy. Between creamy casseroles, buttery rolls, and everything-smothered-in-gravy, sometimes your palate just begs for a little freshness. Enter: this apple pecan salad. It’s bright, crunchy, and sweet-tart in all the right ways—basically fall in a bowl, with just enough elegance to make everyone feel fancy (even if they’re wearing stretchy pants).
It’s a salad that holds its own, thanks to toasty pecans, juicy apple slices, and a maple vinaigrette that’s subtly sweet and tangy. The dried cranberries give it that chewy burst, and if you’re feeling generous, a sprinkle of crumbled feta makes it next-level. Bonus: it actually makes you want to eat your greens before going back for more stuffing. A small miracle.
🍎 The Recipe: Apple Pecan Salad with Maple Dressing
Ingredients:
- 4 cups mixed greens
- 1 apple, thinly sliced (Honeycrisp or Granny Smith are perfect)
- ½ cup pecans, toasted
- ¼ cup dried cranberries
- ¼ cup feta cheese, crumbled (optional)
For the Dressing:
- ¼ cup olive oil
- 2 tbsp pure maple syrup
- 1 tbsp apple cider vinegar
- Salt and pepper, to taste
🥗 Instructions:
- Build the Salad: In a large bowl, layer the mixed greens, apple slices, toasted pecans, cranberries, and feta (if using).
- Make the Dressing: In a small bowl or mason jar, whisk (or shake) together the olive oil, maple syrup, apple cider vinegar, and a pinch of salt and pepper until smooth and emulsified.
- Dress It Up: Drizzle the maple dressing over the salad just before serving. Toss gently to coat.
- Serve Fresh: Best enjoyed immediately while everything’s crisp and vibrant.
🍁 Variations & Twists
- No Feta? Goat cheese, blue cheese, or shaved Parmesan work beautifully too.
- Swap the Nuts: Walnuts or almonds make great substitutes for pecans.
- Add Protein: Grilled chicken or sliced turkey makes it entrée-worthy.
- Fruit Swap: Try thin pear slices or fresh pomegranate seeds instead of apple or cranberries.
❄️ Storage, Prep & Make-Ahead Tips
- Make-Ahead Friendly: Prep all salad components separately—dressing, sliced apples (tossed in lemon juice), and greens—and assemble just before serving.
- Leftovers: Once dressed, it doesn’t keep well, so only toss what you’ll eat right away.
🧺 Packing Tips
Pack the dressing in a small container and toss just before eating to keep everything crisp. Store apples separately with a little lemon juice if prepping for lunch or a potluck.
⏱️ Time-Saving Hacks
- Pre-Sliced Apples: Many grocery stores offer bagged sliced apples (just check for added sugar).
- Buy Toasted Nuts: Or toast a big batch of pecans ahead and keep them in an airtight jar.
- Mason Jar Trick: Layer the salad in a mason jar with dressing on the bottom and greens on top—shake and eat when ready!
⚠️ Allergen Info & Diet Notes
- Gluten-Free: Naturally.
- Vegan: Skip the feta or use a dairy-free version.
- Nut-Free Option: Use roasted pumpkin seeds (pepitas) instead of pecans.
💡 Healthy Tips & Nutrition Notes
This salad is packed with fiber, antioxidants, and healthy fats. The maple dressing has just enough sweetness to satisfy, without tipping into sugary territory. And if you’re watching dairy or calories, it’s easy to lighten it up without sacrificing flavor.
🛒 Mini Shopping List
Produce:
- Mixed greens
- Apple
- Fresh lemon (for tossing apple slices)
Pantry/Fridge:
- Pecans
- Dried cranberries
- Feta (optional)
- Olive oil
- Pure maple syrup
- Apple cider vinegar
- Salt & pepper
Apple pecan salad with maple dressing is that rare holiday unicorn: fast, pretty, and genuinely refreshing. It’s the kind of dish that balances out the gravy parade—and makes you feel like you’ve got your life together, at least until the pie comes out.
So… are you a maple dressing drizzler or a pour-it-all-on-and-go-for-it kind of person?
Cornbread Stuffing: A Southern Spin on a Classic Favorite
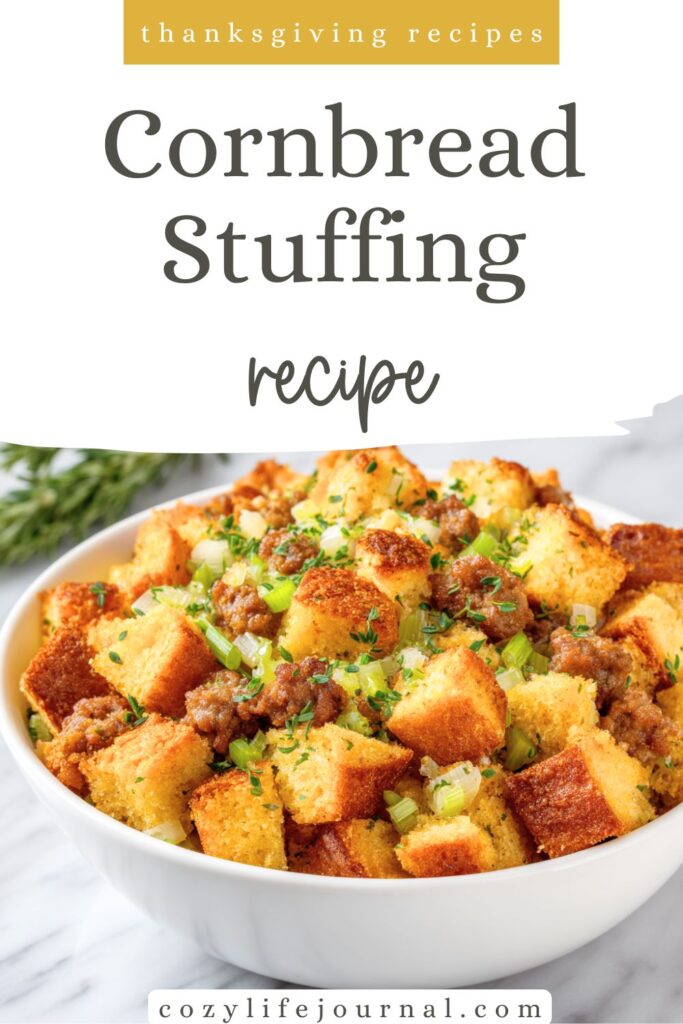
There’s stuffing… and then there’s cornbread stuffing—the buttery, slightly sweet, deeply savory version that feels like a hug from your Southern friend’s grandma. I first made this for a friend who swore by it over the classic kind, and after one bite, I understood the hype. It’s rich, cozy, and full of flavor—and yes, the sausage is a power move.
The combo of tender cornbread, rustic French bread, fresh herbs, and that sausage-spiked, buttery goodness makes it the side dish everyone reaches for. It’s got crispy golden edges, a soft center, and the kind of depth that makes people ask, “Wait—what’s in this?”
If you’re looking to shake up your stuffing game, this is your golden ticket.
🌽 The Recipe: Cornbread Stuffing (With or Without Sausage)
Ingredients:
- 4 cups cubed cornbread (store-bought or homemade)
- ½ loaf French bread, cubed
- 1 lb sausage (optional, but recommended)
- 1 onion, chopped
- 2 celery stalks, chopped
- 1 tbsp fresh sage, chopped
- 1 tbsp fresh thyme, chopped
- 2 cups chicken broth
- ¼ cup melted butter
- Salt and pepper, to taste
🍽️ Instructions:
- Dry the Bread: Preheat oven to 300°F (150°C). Spread the cornbread and French bread cubes on a baking sheet and bake for 15 minutes to dry out. Let cool completely.
- Cook the Sausage: In a large skillet over medium heat, brown the sausage, breaking it into crumbles. Remove from pan and set aside.
- Sauté the Veggies: In the same skillet, cook onion and celery until softened and fragrant, about 5–7 minutes.
- Combine It All: In a large bowl, mix dried bread cubes, sausage, veggies, sage, and thyme. Slowly pour in broth while tossing gently—just until the bread is moist, not soggy. Stir in melted butter and season with salt and pepper.
- Bake to Perfection: Transfer mixture to a greased baking dish. Cover with foil and bake at 350°F (175°C) for 30 minutes. Uncover and bake 10–15 more minutes to crisp the top.
- Serve Warm: Let it rest for a few minutes before serving (but don’t be surprised if someone sneaks a spoonful straight from the dish).
🧂 Variations & Flavor Twists
- Spicy Kick: Use hot Italian sausage or add a pinch of cayenne.
- No Sausage? Sub in mushrooms or roasted butternut squash for a hearty vegetarian version.
- Add Apples: A chopped apple adds a sweet contrast that’s amazing with the savory notes.
- Cornbread-Only: Skip the French bread and go full Southern with all cornbread for a denser, richer texture.
❄️ Storage, Prep & Make-Ahead Tips
- Make Ahead: Assemble the stuffing up to a day ahead (don’t bake yet), cover and chill. Bake right before serving.
- Leftovers: Keep covered in the fridge for 3–4 days. Reheat in the oven or microwave with a splash of broth to refresh.
- Freezer-Friendly: Yes! Freeze the unbaked mix or freeze leftovers in portions and reheat from thawed.
🧺 Packing Tips
Great for travel: bake it in a foil pan, wrap tightly, and reheat at your destination. Keep a little extra melted butter or broth on hand to refresh if needed before serving.
⏱️ Time-Saving Hacks
- Use Pre-Made Cornbread: Grab a store-bought tray and cube it up.
- Chop Ahead: Dice your onion and celery the day before and store in the fridge.
- Skip the Sausage: Still delicious without it—and faster to prep.
⚠️ Allergen Info & Diet Versions
- Gluten-Free: Use gluten-free cornbread and bread. Check your sausage and broth labels too.
- Dairy-Free: Use oil instead of butter and dairy-free bread and cornbread.
- Vegetarian: Skip sausage and use veggie broth. Add extra sautéed mushrooms or nuts for depth.
💡 Healthy Tips & Nutrition Notes
Use whole grain or lower-sugar cornbread for a lighter option. Bulk up the veggie ratio with extra celery, mushrooms, or chopped greens like kale.
🛒 Mini Shopping List
Bakery:
- Cornbread
- French bread
Produce:
- Onion
- Celery
- Fresh sage
- Fresh thyme
Meat/Dairy:
- Sausage (optional)
- Unsalted butter
Pantry:
- Chicken broth
- Salt & pepper
Cornbread stuffing is the kind of dish that blends comfort and celebration into one steamy, fragrant casserole. It’s savory, slightly sweet, and everything we love about fall, baked to golden perfection.
Now tell me—do you fight for the crispy edges or dive straight into the soft, center scoop?
Roasted Acorn Squash with Brown Sugar: Buttery, Golden, and Perfectly Fall
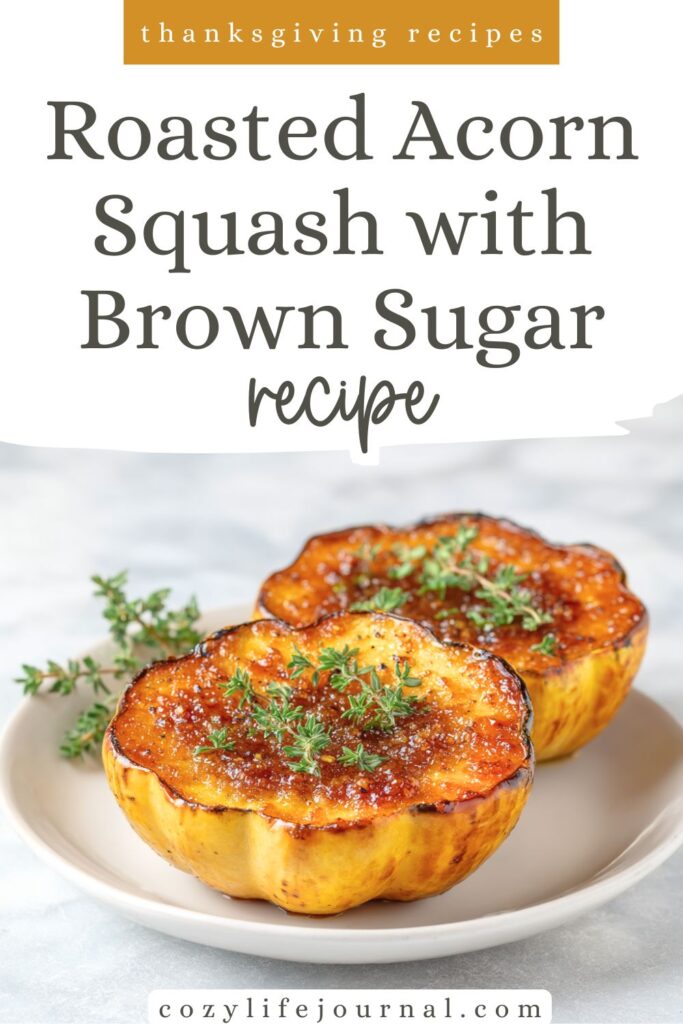
If you’ve never made roasted acorn squash, let me gently say: it’s time. This humble little squash transforms in the oven, turning golden and tender with crispy edges and a buttery, sugary glaze that tastes like autumn itself. It’s one of those “how is this so easy?” kind of dishes that delivers way more than it asks for.
I remember the first time I made this—I nearly ate half a squash straight off the pan. That brown sugar and butter combo? It caramelizes into sticky-sweet perfection. And the best part? You don’t need a culinary degree to make it. Slice, scoop, glaze, roast, done. Bonus points if you remember to line your baking sheet—because yes, caramelized squash glaze is a scrubby situation. Worth it, though.
🍂 The Recipe: Roasted Acorn Squash with Brown Sugar
Ingredients:
- 2 acorn squashes, halved and seeds removed
- 4 tbsp brown sugar
- 2 tbsp unsalted butter, melted
- Salt and pepper, to taste
- Fresh thyme (optional, for garnish)
👩🍳 Instructions:
- Preheat Oven: Set your oven to 400°F (200°C) and line a baking sheet with parchment paper or foil.
- Prep the Squash: Slice each acorn squash in half from stem to tip. Scoop out the seeds and stringy bits with a spoon (an ice cream scoop works great here).
- Glaze It Up: In a small bowl, stir together the melted butter and brown sugar. Season with a little salt and pepper. Brush the mixture generously over the cut sides of the squash.
- Roast:
- For caramelized edges: Place the squash cut-side down.
- For a glazed finish: Roast cut-side up.
Bake for 45–50 minutes until the squash is fork-tender and edges are golden.
- Serve It Warm: Garnish with fresh thyme if you’re feeling fancy, and serve straight from the pan or on a platter of cozy fall goodness.
🍯 Variations & Flavor Twists
- Savory Style: Add minced garlic and fresh herbs like rosemary or thyme to the butter mixture.
- Spiced Up: Mix in a pinch of cinnamon, nutmeg, or cayenne for extra warmth.
- Maple Moment: Sub out the brown sugar for maple syrup for a deeper, earthy sweetness.
- Add Nuts: Sprinkle chopped pecans or walnuts over the squash for crunch and contrast.
❄️ Storage, Prep & Make-Ahead Tips
- Make Ahead: Roast earlier in the day and reheat in the oven at 325°F until warmed through.
- Leftovers: Store in the fridge for up to 3 days. Reheat in the oven or microwave.
- Freezer-Friendly: Freeze cooked squash halves and reheat straight from frozen—great for batch prepping!
🧺 Packing Tips
Cut the squash halves into wedges and pack in a heat-safe container. Add a drizzle of extra glaze (or even maple syrup) before reheating to keep them moist and flavorful.
⏱️ Time-Saving Hacks
- Pre-Cut Squash: Many stores now sell halved and seeded squash—grab one and skip the slicing struggle.
- Microwave Start: Soften squash in the microwave for 3–5 minutes before slicing if it’s especially tough to cut.
⚠️ Allergen Info & Diet Versions
- Gluten-Free: Naturally GF!
- Dairy-Free/Vegan: Swap butter for vegan butter or coconut oil.
- Nut-Free: Totally nut-free as-is.
💡 Healthy Tips & Nutrition Notes
Acorn squash is packed with fiber, vitamin C, and potassium. A little butter and sugar go a long way, so you get big flavor without going overboard. You can always use less sugar or balance with herbs for a lighter touch.
🛒 Mini Shopping List
Produce:
- 2 acorn squashes
- Fresh thyme (optional)
Pantry/Fridge:
- Brown sugar
- Unsalted butter
- Salt & pepper
Optional Extras:
- Cinnamon or nutmeg
- Maple syrup
- Chopped nuts
Roasted acorn squash is the kind of dish that makes you want to light a candle, pour some cider, and lean all the way into fall. It’s sweet, savory, and quietly spectacular.
Now tell me—do you scoop it right from the skin or slice it into wedges and eat with your fingers like me?
Pecan Pie Bars: All the Flavor, None of the Forks
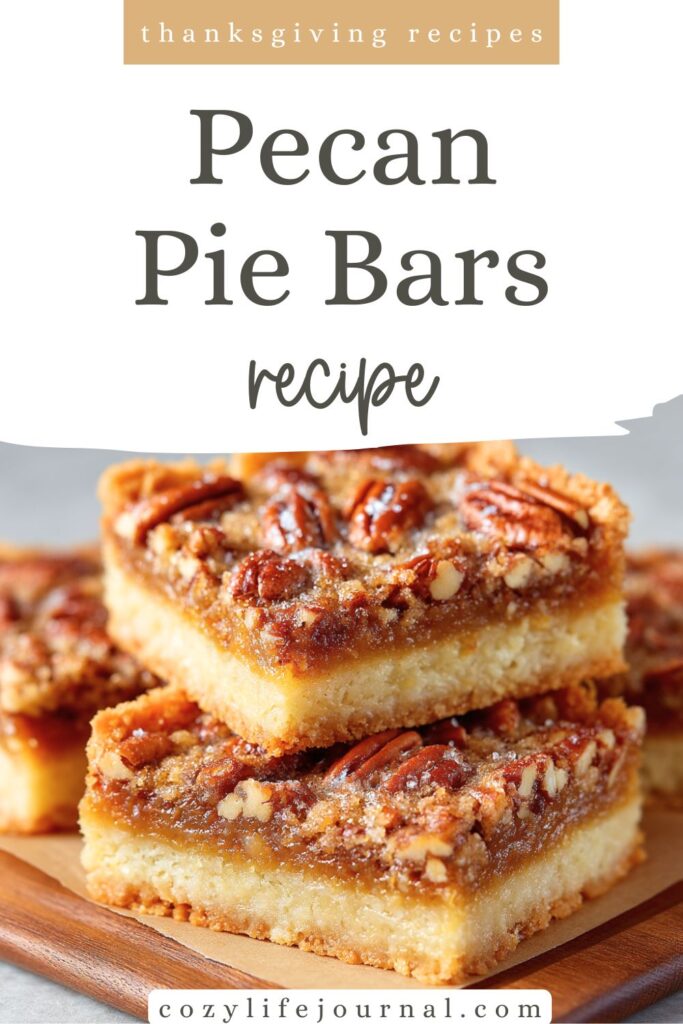
Pecan pie is a holiday icon, no question. But let’s be honest: slicing a perfectly clean piece of pie after a big meal is… optimistic. That’s where pecan pie bars come in. They’ve got everything you love about classic pecan pie—sticky-sweet filling, toasted pecans, buttery crust—but in a grab-and-go square that’s dangerously easy to eat.
These bars are a game-changer for potlucks, dessert tables, or those moments when you want “just a bite” (which, let’s be real, turns into three). They’re rich, sweet, and utterly addictive—and you don’t even need a pie plate.
🥧 The Recipe: Pecan Pie Bars
For the Crust:
- 1¾ cups all-purpose flour
- ½ cup unsalted butter, softened
- ¼ cup brown sugar
- Pinch of salt
For the Filling:
- 3 large eggs
- ¾ cup corn syrup
- 1 cup brown sugar
- 2 tbsp unsalted butter, melted
- 1 tsp vanilla extract
- 2 cups pecans, chopped
🍯 Instructions:
- Preheat Oven: Set your oven to 350°F (175°C). Line a 9×13-inch baking pan with parchment paper, leaving overhang for easy removal.
- Make the Crust: In a medium bowl, mix flour, softened butter, brown sugar, and salt until crumbly. Press evenly into the bottom of the prepared pan.
- Bake the Crust: Bake for 15–18 minutes, until just lightly golden. Let it cool slightly while you prep the filling.
- Mix the Filling: In a large bowl, whisk together eggs, corn syrup, brown sugar, melted butter, and vanilla until smooth. Stir in chopped pecans.
- Pour & Bake: Pour the filling evenly over the crust. Bake for 25–30 minutes, or until the filling is set and golden brown on top.
- Cool & Slice: Let the bars cool completely in the pan before lifting out and slicing into squares. Chilling them helps you get those clean, bakery-style edges.
🥄 Variations & Flavor Twists
- Bourbon Kick: Add 1–2 tbsp of bourbon to the filling for depth and warmth.
- Chocolatey Twist: Toss in a handful of mini chocolate chips for a Turtle-style spin.
- Maple Version: Use maple syrup instead of corn syrup for a cozy fall flavor.
- Nut Swap: Mix in walnuts or use a blend for a fun twist.
❄️ Storage, Prep & Make-Ahead Tips
- Make Ahead: These bars can be made 1–2 days in advance and taste even better the next day.
- Storage: Keep in an airtight container at room temperature for 2–3 days, or refrigerate for up to 5 days.
- Freezer-Friendly: Yes! Wrap tightly and freeze for up to 2 months. Thaw in the fridge overnight.
🧺 Packing Tips
Perfect for holiday boxes or potluck trays: separate layers with parchment paper and pack in a snug container so they don’t shift in transit.
⏱️ Time-Saving Hacks
- Use a Food Processor: Pulse the crust ingredients instead of mixing by hand for a faster prep.
- Pre-Chopped Pecans: Grab a bag of chopped pecans to skip the knife work.
- One-Bowl Filling: Whisk everything in the same bowl for easier cleanup.
⚠️ Allergen Info & Diet Versions
- Nut-Free: Not this time, friends—but try subbing sunflower seeds for a similar crunch in a different bar base.
- Gluten-Free: Use a 1:1 gluten-free flour blend for the crust.
- Dairy-Free: Use plant-based butter alternatives for the crust and filling.
💡 Healthy Tips & Nutrition Notes
Pecan pie bars are rich and sweet—meant to be savored. If you’re looking to lighten them a bit, cut the sugar by ¼ cup and try using a mix of whole wheat and all-purpose flour in the crust.
🛒 Mini Shopping List
Pantry:
- All-purpose flour
- Brown sugar
- Corn syrup
- Vanilla extract
- Salt
Fridge:
- Eggs
- Unsalted butter
Extras:
- Chopped pecans
- Optional: chocolate chips, bourbon, maple syrup
These pecan pie bars are your shortcut to dessert bliss—no slicing drama, no crust tears, just buttery, sticky, nutty squares of heaven.
So tell me… are you a crispy corner piece person or a soft, gooey center slice kind of dessert lover?
Apple Crisp (Single-Serve or Whole Pan Style)

The coziest, crispiest dessert—perfect for a crowd, or portioned just for you.
🧁 Serving & Baking Options
You can bake this apple crisp as one big, crowd-pleasing dessert in an 8×8-inch dish or portion it into individual ramekins or oven-safe bowls for a more elegant, spoon-it-up experience—just like the one in the photo.
🥣 For Individual Servings (Like in the Image):
- Use 6–8 ramekins or small oven-safe bowls (about 6 oz each).
- Divide the apple mixture evenly between the ramekins. Then do the same with the crisp topping.
- Place the ramekins on a baking sheet to catch any juicy overflow (trust me, worth it).
- Bake at 350°F (175°C) for about 25–30 minutes, or until the tops are golden and the apples are bubbling at the edges.
👉 Pro Tip: Because the ramekins are smaller, they bake a bit faster than a full dish. Keep an eye on them after the 25-minute mark!
🧁 For a Traditional 8×8 Baking Dish:
Just follow your original instructions—same bake temp, same timing (35–40 minutes), same irresistible results.
💡 Extra Tips for Both Styles:
- Apple Variety: Mixing tart and sweet apples (like Granny Smith + Honeycrisp) gives the best balance.
- Make Ahead: Assemble the crisp, cover, and refrigerate unbaked for up to a day. Bake just before serving.
- Topping Tweaks: Add chopped pecans or walnuts to the oat topping for extra crunch.
🛒 Mini Shopping List (Grouped for Ramekin or Pan Baking)
Produce:
- 6–7 apples
- 1 lemon
Pantry:
- Granulated sugar
- Brown sugar
- Cinnamon, nutmeg
- Old-fashioned oats
- All-purpose flour
- Salt
Fridge:
- Vanilla ice cream (non-negotiable)
- Unsalted butter
Butternut Squash Gnocchi with Sage Butter: A Cozy Autumn Pasta Dream
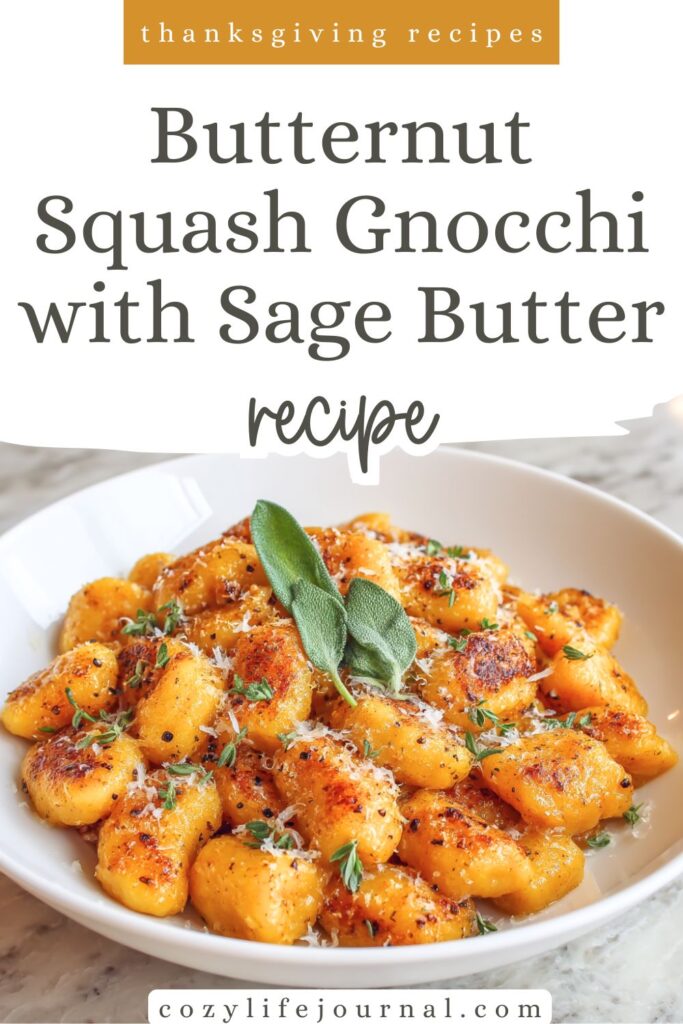
If fall were a pasta dish, this would be it. Butternut squash gnocchi—soft, golden, melt-in-your-mouth little pillows—tossed in nutty brown butter and crispy sage? Yes, please. It’s rich, savory, subtly sweet, and totally luxurious without feeling fussy.
This dish hits all the right notes: silky squash meets creamy ricotta, a whisper of nutmeg ties it all together, and the sage butter is the golden finale. Whether you’re looking to impress veggie-loving guests or just want something a little extra special on a chilly night, this recipe is a showstopper.
It also makes a beautiful Thanksgiving side, but don’t be surprised if it quietly steals the spotlight.
🧡 The Recipe: Butternut Squash Gnocchi with Sage Butter
Ingredients:
- 1 cup roasted butternut squash puree (about ½ a small squash)
- 1 cup whole milk ricotta cheese
- 1 large egg
- 1–1¼ cups all-purpose flour (plus more for dusting)
- ½ tsp salt
- ¼ tsp black pepper
- ⅛ tsp ground nutmeg
- 4 tbsp unsalted butter
- 8–10 fresh sage leaves
- Grated Parmesan, for serving
👩🍳 Instructions:
- Make the Dough:
In a large bowl, mix together the squash puree, ricotta, egg, salt, pepper, and nutmeg until smooth. Gradually add flour until a soft dough forms—sticky is okay, but it should hold together. - Shape the Gnocchi:
Lightly flour your work surface. Divide the dough into 4 portions, and roll each into a rope about ½ inch thick. Cut into 1-inch pieces. Optional: give each gnocchi a quick roll with a fork for ridges. - Cook the Gnocchi:
Bring a pot of salted water to a boil. Cook gnocchi in batches for 2–3 minutes, or until they float. Use a slotted spoon to transfer to a plate. - Make the Sage Butter:
In a large skillet, melt the butter over medium heat. Add the sage leaves and cook until the butter browns and the sage turns crispy—about 2–3 minutes. - Toss and Serve:
Add the gnocchi to the skillet and gently toss to coat. Let them brown lightly in the butter for a minute or two. Serve warm, topped with Parmesan.
🍽️ Variations & Flavor Twists
- Brown Butter + Garlic: Add a clove of smashed garlic to the butter for a richer, more savory base.
- Crispy Pancetta: Sprinkle cooked pancetta or prosciutto over the top for a salty crunch.
- Vegan Option: Use vegan ricotta and plant-based butter; skip the egg or use a flax egg.
- Gluten-Free: Use a 1:1 gluten-free flour blend and dust generously.
❄️ Storage, Prep & Make-Ahead Tips
- Make Ahead: Shape the gnocchi and freeze them in a single layer. Transfer to a bag once frozen solid. Cook from frozen—no need to thaw.
- Leftovers: Store cooked gnocchi in the fridge up to 2 days. Reheat gently in a skillet with butter.
- Squash Shortcut: Use canned butternut squash puree to save time—but roast your own if you can for extra flavor.
🧺 Packing Tips
This is a beautiful dish to prep ahead for dinner parties or Friendsgiving. Just cook the gnocchi, cool, and reheat in the sage butter at the last minute. Serve in a shallow dish or mini bowls for extra elegance.
⏱️ Time-Saving Hacks
- Use Store-Bought Squash Puree: Cuts down prep time drastically.
- Skip the Fork Ridges: They’re pretty, but optional. A quick slice-and-go is just as delicious.
- Double Batch: Make extra and freeze half. Future-you will be thrilled.
⚠️ Allergen Info & Diet Notes
- Vegetarian-Friendly: Yes!
- Dairy-Free Option: Use dairy-free ricotta and butter alternatives.
- Egg-Free Adaptation: Use a flax or chia egg (1 tbsp ground flax + 2.5 tbsp water, rest 5 mins).
💡 Healthy Tips & Nutrition Notes
Butternut squash adds fiber and vitamin A, while ricotta brings protein and creaminess. You can swap in whole wheat flour or half-and-half with almond flour for a more nutrient-dense option.
🛒 Mini Shopping List
Produce:
- Butternut squash
- Fresh sage
Fridge:
- Ricotta cheese
- Unsalted butter
- Egg
- Grated Parmesan
Pantry:
- All-purpose flour
- Salt & pepper
- Ground nutmeg
Butternut squash gnocchi with sage butter is one of those dishes that feels special enough for a celebration but comforting enough to make on a cozy night in. It’s golden, pillowy, and a little bit magical—just like autumn should be.
Tell me—do you crisp the gnocchi for extra texture or keep them soft and saucy?
Creamed Spinach Gratin: The Coziest Way to Eat Your Greens
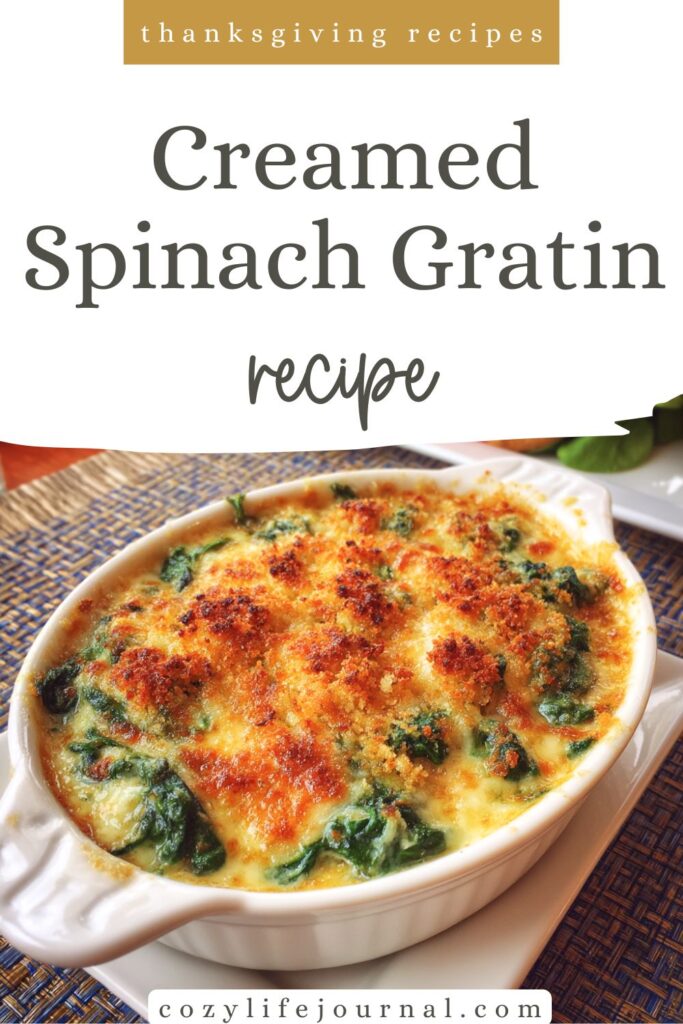
This dish is what happens when comfort food meets your daily dose of greens—and it shows up wearing golden breadcrumbs like a crown. Creamed spinach gratin is rich, cheesy, and surprisingly elegant, while still being the kind of food you want to sneak spoonfuls of straight from the baking dish.
Even the veggie skeptics in my family (you know who you are) ask for seconds of this one. It’s warm, garlicky, and has just the right amount of crunch on top to balance out that creamy center. It’s like spinach went to finishing school and came back all grown up—with cheese.
Whether it’s taking a starring role on a holiday table or just jazzing up your weeknight dinner lineup, this gratin is low-key luxurious and absolutely worth the extra minute to make from scratch.
🌿 The Recipe: Creamed Spinach Gratin
Ingredients:
- 2 lbs fresh spinach (or 2 packages frozen, thawed and drained)
- ½ cup heavy cream
- ½ cup whole milk
- ½ cup grated Parmesan cheese
- 2 tbsp unsalted butter
- 1 tbsp all-purpose flour
- 1 garlic clove, minced
- ½ cup breadcrumbs
- Salt and pepper, to taste
👩🍳 Instructions:
- Prep the Spinach:
- Fresh: Blanch spinach in boiling water for 1–2 minutes, then drain and squeeze out all the excess moisture (really get in there!).
- Frozen: Thaw completely and squeeze dry.
- Make the Cream Sauce:
In a medium saucepan, melt butter over medium heat. Add garlic and sauté for 1 minute. Stir in flour and cook for another minute to form a roux. Slowly whisk in milk and cream. Simmer until thickened and velvety. - Add Spinach & Cheese:
Stir the drained spinach into the sauce. Mix in Parmesan, season with salt and pepper, and stir until creamy and well combined. - Assemble the Gratin:
Preheat oven to 375°F (190°C). Pour the creamy spinach mixture into a greased baking dish. Sprinkle breadcrumbs evenly over the top. - Bake:
Bake uncovered for 15–20 minutes until the breadcrumbs are golden and the edges are bubbling. - Serve Hot:
Dish it up warm and watch it disappear.
🧄 Variations & Flavor Twists
- Add Cheese: Stir in shredded Gruyère, mozzarella, or sharp white cheddar for an extra-rich filling.
- Crunch Factor: Mix a little melted butter or olive oil into the breadcrumbs before topping for added crispiness.
- Make It Fancy: Use panko and add a sprinkle of fresh thyme or lemon zest before baking.
❄️ Storage, Prep & Make-Ahead Tips
- Make Ahead: Assemble the gratin and refrigerate (unbaked) for up to 24 hours. Bake when ready to serve.
- Leftovers: Store covered in the fridge for 3–4 days. Reheat gently in the oven to restore the crisp topping.
- Freezer-Friendly: Freeze in individual portions for future comfort food moments—just reheat from frozen at 350°F until warmed through.
🧺 Packing Tips
Great for potlucks or family dinners: bake it in a foil pan, cover loosely with foil, and reheat uncovered to crisp the top before serving. Bring a little extra Parmesan for sprinkling just before serving for a fresh finish.
⏱️ Time-Saving Hacks
- Use Frozen Spinach: Saves washing, trimming, and blanching time. Just thaw and squeeze well.
- Pre-Made Breadcrumbs: Grab seasoned or panko for extra flavor and crunch.
- One-Pot Wonder: Make the cream sauce in an oven-safe skillet, add the spinach, top with breadcrumbs, and bake right in the same pan.
⚠️ Allergen Info & Diet Versions
- Gluten-Free: Use a GF flour blend for the roux and gluten-free breadcrumbs.
- Dairy-Free: Sub plant-based milk, cream, and cheese. Use olive oil instead of butter.
- Nut-Free: Completely nut-free as-is!
💡 Healthy Tips & Nutrition Notes
Spinach is rich in iron, fiber, and vitamins A and C—and when it’s wrapped in a cheesy cream sauce, nobody minds eating their greens. You can lighten it up with half-and-half instead of heavy cream or use part-skim milk and cheese.
🛒 Mini Shopping List
Produce:
- Fresh spinach (or frozen)
- Garlic
Fridge:
- Heavy cream
- Whole milk
- Unsalted butter
- Parmesan cheese
Pantry:
- All-purpose flour
- Breadcrumbs
- Salt & pepper
This creamed spinach gratin is a total comfort food sleeper hit—humble ingredients, dreamy texture, and just enough flair to make it feel special. It’s veggie-packed without feeling like a “vegetable dish,” and that’s the real magic.
So… do you go full side dish, or just grab a spoon and make it dinner?
Caramelized Onion and Mushroom Tart: The Appetizer That Vanishes First

If you’re hosting a holiday gathering, dinner party, or let’s-be-honest wine night, this tart needs to be on your table. It’s the perfect storm of flavor: buttery puff pastry, deeply caramelized onions, golden mushrooms, and creamy goat cheese, all tucked into a rustic, golden crust. Add a sprinkle of thyme, and you’ve got something that looks fancy but is secretly easy to pull off.
I usually make two because the first one? Gone before I finish pouring drinks. It’s rich, earthy, slightly tangy, and totally addictive—and it hits that sweet spot between appetizer and “honestly, I could eat this for dinner.”
🍄 The Recipe: Caramelized Onion and Mushroom Tart
Ingredients:
- 1 sheet puff pastry, thawed
- 2 large onions, thinly sliced
- 2 cups mushrooms, sliced
- ¼ cup goat cheese, crumbled
- 1 tbsp balsamic vinegar
- 1 tbsp olive oil
- 1 egg, beaten (for egg wash)
- Fresh thyme, for garnish
- Salt and pepper, to taste
👩🍳 Instructions:
- Preheat the Oven:
Preheat your oven to 400°F (200°C) and line a baking sheet with parchment paper. - Caramelize the Onions:
Heat olive oil in a large skillet over medium heat. Add sliced onions and cook slowly, stirring occasionally, for 20–30 minutes until golden and soft. Stir in balsamic vinegar and cook for another 2 minutes. - Sauté the Mushrooms:
In the same pan, add mushrooms. Cook until they release their liquid and turn golden brown. Season with salt and pepper. - Assemble the Tart:
Roll out puff pastry on a lightly floured surface (just enough to smooth it out) and transfer to the prepared baking sheet. Spread onions over the pastry, leaving a 1-inch border. Top with mushrooms and crumbled goat cheese. - Fold & Finish:
Fold the edges of the pastry up and over the filling slightly, creating a rustic edge. Brush the border with the beaten egg. - Bake:
Bake for 20–25 minutes, or until the pastry is puffed and golden brown. - Serve:
Garnish with fresh thyme and serve warm or at room temperature.
🧅 Variations & Flavor Twists
- Cheese Swap: Try blue cheese, feta, or shredded Gruyère for a different twist.
- Add Sweetness: A drizzle of honey after baking pairs beautifully with the tangy goat cheese.
- Make it Meaty: Add crumbled cooked bacon or pancetta for a heartier tart.
- Herby Upgrade: Stir fresh rosemary or thyme into the onions as they caramelize.
❄️ Storage, Prep & Make-Ahead Tips
- Make Ahead: Caramelize onions and sauté mushrooms the day before. Assemble and bake just before serving.
- Leftovers: Store covered in the fridge for up to 3 days. Reheat in a 300°F oven to crisp the pastry.
- Freezer-Friendly: Assemble the tart and freeze unbaked. Bake straight from frozen at 375°F for 30–35 minutes.
🧺 Packing Tips
Perfect for potlucks or picnics—slice into squares or wedges and pack in a parchment-lined container. Serve slightly warm or at room temp for best texture.
⏱️ Time-Saving Hacks
- Pre-Sliced Mushrooms: Cuts prep time way down.
- Use Store-Bought Caramelized Onion Jam: A good shortcut in a pinch.
- Sheet Pan Shortcut: Double the recipe and bake a larger tart on a full sheet pan to serve a crowd.
⚠️ Allergen Info & Diet Notes
- Vegetarian-Friendly: Absolutely.
- Gluten-Free Option: Use gluten-free puff pastry if available.
- Dairy-Free Alternative: Sub a dairy-free cheese or skip it altogether—the onions and mushrooms still shine.
🛒 Mini Shopping List
Produce:
- Onions
- Mushrooms
- Fresh thyme
Fridge/Pantry:
- Puff pastry
- Goat cheese
- Egg
- Olive oil
- Balsamic vinegar
- Salt & pepper
This tart is everything a good appetizer should be—impressive, savory, and just a little indulgent. Bonus: it makes you look like you spent way more time in the kitchen than you actually did.
Tell me—are you team rustic free-form tart, or do you go full-on puff pastry rectangle with clean edges?
Baked Mac and Cheese: The Ultimate Crowd-Pleaser
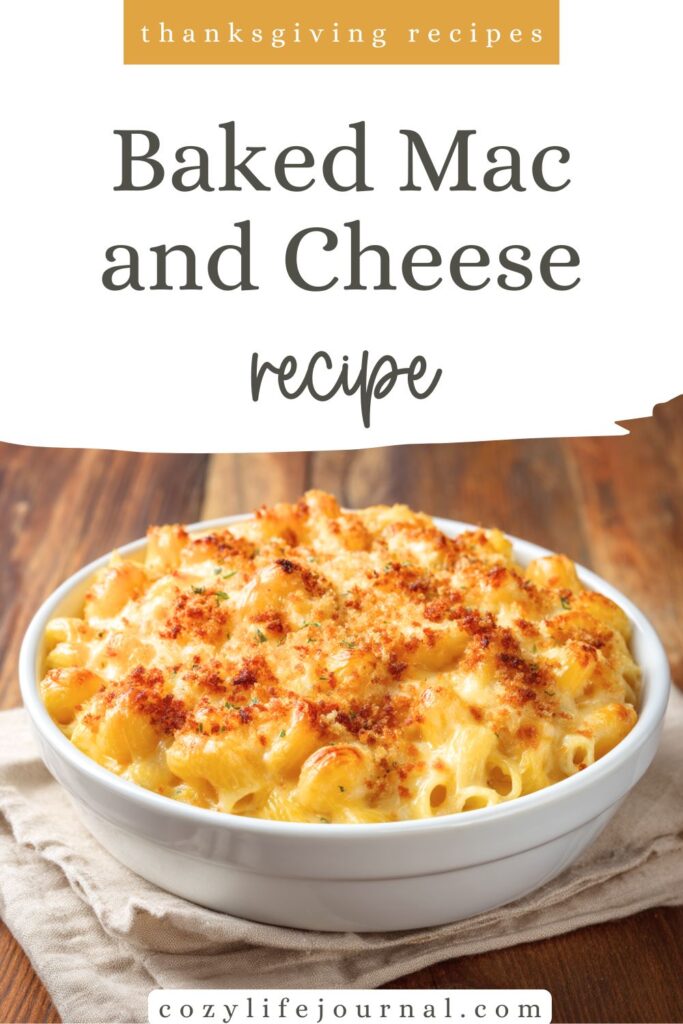
Mac and cheese is more than a side dish—it’s an emotion. That first spoonful of creamy, gooey cheese wrapped around tender pasta with a golden breadcrumb crust? Pure joy. And while stovetop versions are great in a pinch, baking it takes things to a whole new level of cozy, crispy, cheesy magic.
Every time I make this for a gathering, I swear I’ll double the recipe. Every time, I don’t. And every time? Not a single spoonful is left. It’s rich, comforting, and just fancy enough (thank you, Gruyère) to make it feel special, without losing its nostalgic charm.
🧀 The Recipe: Baked Mac and Cheese
Ingredients:
- 2 cups elbow macaroni
- 2 cups sharp cheddar cheese, grated
- 1 cup Gruyère cheese, grated
- 2 cups milk
- 2 tbsp unsalted butter
- 2 tbsp all-purpose flour
- ½ cup breadcrumbs
- Salt and pepper, to taste
👩🍳 Instructions:
- Cook the Pasta:
Bring a large pot of salted water to a boil. Cook macaroni according to package directions until al dente. Drain and set aside. - Make the Cheese Sauce:
In a large saucepan, melt butter over medium heat. Whisk in flour and cook for 1 minute to form a roux. Slowly add milk, whisking constantly, until the sauce thickens. Stir in cheddar and Gruyère until smooth and melty. Season with salt and pepper. - Combine Pasta and Sauce:
Stir the drained macaroni into the cheese sauce until fully coated. - Bake:
Preheat oven to 350°F (175°C). Transfer mac and cheese to a greased baking dish. Sprinkle breadcrumbs evenly over the top. - Golden Finish:
Bake for 20–25 minutes, or until bubbly and golden brown on top. - Cool & Serve:
Let sit for a few minutes before serving—just enough time for the cheese to set and the crust to crisp perfectly.
🥄 Variations & Flavor Twists
- Add Heat: Stir in a pinch of cayenne or a few dashes of hot sauce to the cheese sauce.
- Make It Smoky: Use smoked cheddar or smoked paprika for depth.
- Mix in Extras: Bacon bits, sautéed mushrooms, or caramelized onions make it next-level.
- Breadcrumb Boost: Mix melted butter and a bit of Parmesan into the breadcrumbs before topping for even more crunch.
❄️ Storage, Prep & Make-Ahead Tips
- Make Ahead: Assemble the mac and cheese (minus the topping), cover, and refrigerate for up to a day. Add breadcrumbs right before baking.
- Leftovers: Store in the fridge for up to 4 days. Reheat in the oven with a splash of milk stirred in to keep it creamy.
- Freezer-Friendly: Yes! Freeze before baking, then bake straight from frozen at 350°F for 40–45 minutes.
🧺 Packing Tips
This dish travels beautifully for potlucks or holidays. Bake it in a foil pan or casserole with a lid, and cover loosely with foil for the journey. Reheat uncovered for a crispy topping.
⏱️ Time-Saving Hacks
- Pre-Shredded Cheese: Saves time (just avoid anti-caking blends for smooth sauce).
- One-Pot Wonder: Cook the pasta, drain, then use the same pot for your cheese sauce to cut down on dishes.
⚠️ Allergen Info & Diet Versions
- Gluten-Free: Use GF pasta and flour for the roux; sub gluten-free breadcrumbs.
- Dairy-Free: Sub dairy-free milk, cheese, and butter (look for melt-friendly vegan cheese).
- Nut-Free: Naturally nut-free!
💡 Healthy-ish Tips
- Use whole grain or legume pasta for added fiber and protein.
- Swap half the cheddar for low-fat cheese or use Greek yogurt for part of the milk.
- Stir in steamed broccoli or spinach for a veggie-packed twist.
🛒 Mini Shopping List
Pantry:
- Elbow macaroni
- All-purpose flour
- Breadcrumbs
- Salt & pepper
Fridge:
- Cheddar cheese
- Gruyère cheese
- Milk
- Unsalted butter
Whether it’s a holiday side, weeknight indulgence, or the main event on a chilly evening, this baked mac and cheese is comfort food in its purest, crunchiest, creamiest form.
So tell me—do you fight for the corner pieces with the extra crust, or are you all about that ultra-gooey center?
Pecan-Crusted Salmon: A Lighter, Elegant Alternative to Turkey
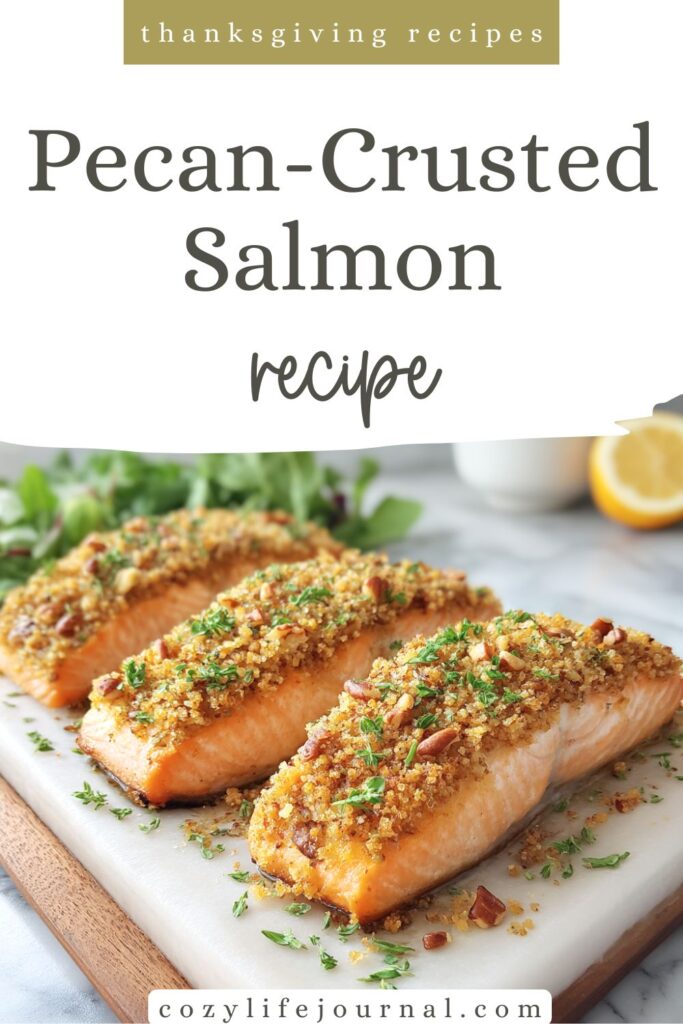
Sometimes, in the midst of rich gravies, buttery sides, and never-ending stuffing, your palate starts whispering, “Hey… maybe something lighter?” Enter: pecan-crusted salmon. It’s crisp on the outside, tender and flaky on the inside, and somehow manages to feel both indulgent and fresh.
The crunchy, nutty topping made with Dijon and honey gives the salmon a flavorful crust without overpowering it. It’s just the right balance of savory, slightly sweet, and texturally satisfying. This dish not only looks beautiful on the plate, but it’s also a total flavor bomb—and a great option for pescatarians or anyone who wants to mix up the main course lineup.
And let’s be honest: after three kinds of potatoes and two rounds of pie, your guests might be grateful for something a little leaner (but still luxurious).
🐟 The Recipe: Pecan-Crusted Salmon
Ingredients:
- 4 salmon fillets
- 1 cup pecans, finely chopped
- ¼ cup Dijon mustard
- 1 tbsp honey
- 1 tbsp olive oil
- Salt and pepper, to taste
👩🍳 Instructions:
- Preheat the Oven:
Set your oven to 400°F (200°C) and line a baking sheet with parchment paper for easy cleanup. - Make the Pecan Topping:
In a small bowl, mix together chopped pecans, Dijon mustard, honey, and olive oil until it forms a coarse paste. - Prep the Salmon:
Place salmon fillets skin-side down on the prepared baking sheet. Season lightly with salt and pepper. Spread the pecan mixture evenly over the top of each fillet, pressing gently to adhere. - Bake:
Bake for 12–15 minutes, or until the salmon is cooked through and flakes easily with a fork, and the crust is golden brown. - Serve:
Plate with a side of roasted vegetables or a crisp, lemony salad for a beautifully balanced meal.
🌰 Variations & Flavor Twists
- Spice It Up: Add a pinch of cayenne or smoked paprika to the pecan mix for warmth.
- Sweet & Savory: Swap honey for maple syrup or brown sugar for a deeper sweetness.
- Nut Swap: Use chopped walnuts or almonds if you’re out of pecans.
- Herb Boost: Add fresh thyme or parsley to the topping for an herby kick.
❄️ Storage, Prep & Make-Ahead Tips
- Make Ahead: Chop pecans and mix the topping in advance—store in the fridge for up to 2 days.
- Leftovers: Store salmon in an airtight container in the fridge for up to 3 days. Reheat gently at 300°F to keep the crust crisp.
- Meal Prep Friendly: Great cold over a salad the next day!
🧺 Packing Tips
This dish travels well if baked and served within a couple hours. Keep it loosely covered with foil to retain heat but avoid steaming the crust. Bring lemon wedges or a quick herbed yogurt sauce for a bright finish.
⏱️ Time-Saving Hacks
- Use Pre-Chopped Pecans: Available in the baking aisle—huge time saver.
- Sheet Pan Dinner: Roast seasonal vegetables on the same tray for a one-pan meal.
- Frozen Fillets: Thaw overnight in the fridge for a quick weeknight option.
⚠️ Allergen Info & Diet Versions
- Gluten-Free: Naturally GF—just make sure your mustard is labeled gluten-free.
- Dairy-Free: Yep, no dairy here!
- Low-Carb/Keto: Totally low-carb friendly, with healthy fats and protein.
💡 Healthy Tips & Nutrition Notes
Salmon is packed with omega-3s and high-quality protein, and the pecan topping adds heart-healthy fats and a satisfying crunch. Serve with steamed greens or roasted Brussels sprouts for a nutrient-rich, satisfying meal.
🛒 Mini Shopping List
Fridge:
- Salmon fillets
- Dijon mustard
- Honey
Pantry:
- Pecans
- Olive oil
- Salt & pepper
Optional Extras:
- Lemon wedges
- Roasted veggies or salad ingredients
This pecan-crusted salmon is the kind of dish that makes a meal feel special—without demanding hours in the kitchen. It’s elegant, wholesome, and perfect for when you want something a little different… but still totally delicious.
Are you team classic turkey or does a dish like this win your holiday main dish vote?
Pumpkin Cheesecake: Fall’s Dreamiest Dessert Mash-Up
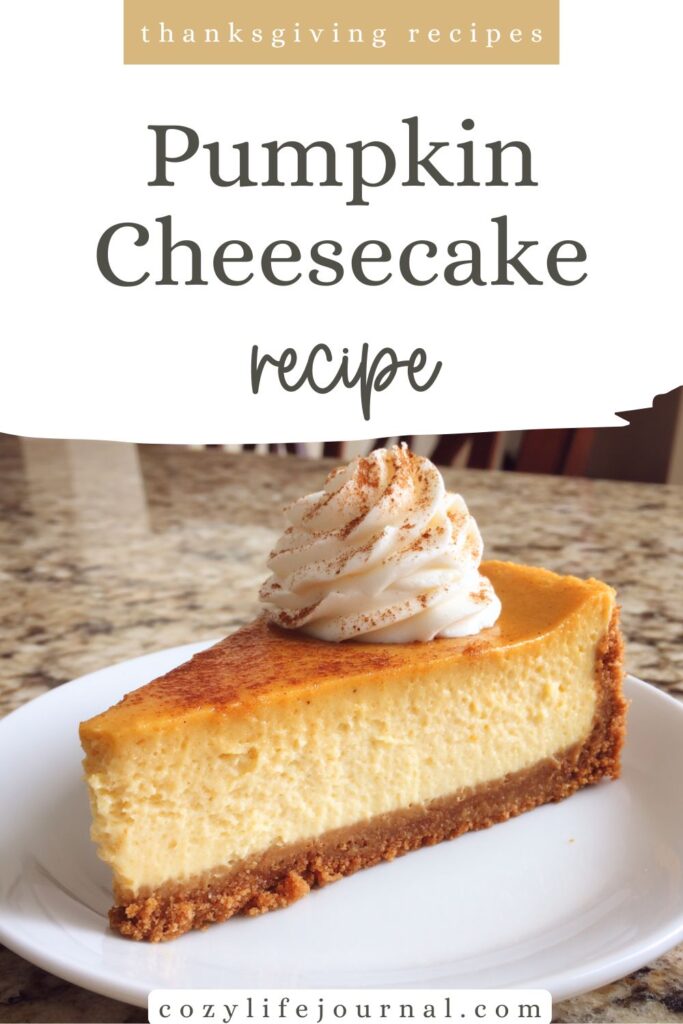
Some desserts make you choose—pumpkin pie or cheesecake. But this one? It laughs in the face of indecision and says, “Why not both?” With a buttery graham cracker crust and a smooth, spiced pumpkin filling, this pumpkin cheesecake is indulgent, festive, and just the right amount of fancy. Think of it as pumpkin pie’s sophisticated cousin who lives in a swanky downtown apartment but still loves Thanksgiving dinner.
It’s a make-ahead hero (yes, fridge-friendly!) and brings the kind of rich, creamy texture that makes everyone pause mid-bite and go, “Wait… did you make this from scratch?” The answer, of course, is yes—and you deserve every bit of that praise.
🎃 The Recipe: Pumpkin Cheesecake
For the Crust:
- 1½ cups graham cracker crumbs
- ¼ cup sugar
- ½ cup unsalted butter, melted
For the Filling:
- 2 (8 oz) packages cream cheese, softened
- 1 cup pumpkin puree
- ¾ cup sugar
- 2 large eggs
- 1 tsp cinnamon
- ½ tsp nutmeg
- ¼ tsp ground cloves
👩🍳 Instructions:
- Preheat the Oven:
Set it to 325°F (160°C). Grease a 9-inch springform pan or line the bottom with parchment. - Make the Crust:
In a bowl, mix graham cracker crumbs, sugar, and melted butter until it resembles wet sand. Press the mixture firmly into the bottom of the pan. Bake for 8–10 minutes, then cool while you prep the filling. - Mix the Filling:
Beat softened cream cheese until completely smooth—no lumps! Add in pumpkin puree, sugar, eggs, and spices. Beat until fully combined and silky. - Assemble & Bake:
Pour the filling over the cooled crust. Bake for 50–60 minutes, or until the center is just set with a slight jiggle. Turn off the oven, crack the door, and let it cool inside for 1 hour to prevent cracking. - Chill & Serve:
Refrigerate for at least 4 hours (overnight is even better). Serve with a cloud of whipped cream and a dash of cinnamon.
🍁 Variations & Flavor Twists
- Maple Twist: Replace half the sugar with maple syrup for a deeper fall flavor.
- Spiked Whip: Add a splash of bourbon or vanilla to the whipped cream topping.
- Gingersnap Crust: Use crushed gingersnap cookies in place of graham crackers for extra spice.
- No Bake Shortcut: Use a no-bake crust and chill the filling in mini jars for a cheesecake-in-a-cup moment.
❄️ Storage, Prep & Make-Ahead Tips
- Make Ahead: This cheesecake is even better the next day. Just chill, cover, and stash it safely away from sneaky fridge grazers.
- Leftovers: Store covered in the fridge for up to 5 days.
- Freezer-Friendly: Freeze whole or in slices, tightly wrapped. Thaw in the fridge overnight.
🧺 Packing Tips
Bringing this to a gathering? Leave it in the springform base and pack it in a cake carrier or foil-wrapped pan. Transport chilled, and top with whipped cream just before serving.
⏱️ Time-Saving Hacks
- Room Temp Cream Cheese: Forgot to soften it? Microwave unwrapped cream cheese on low power in 10-second bursts until just soft.
- Pre-Made Crust: In a pinch, a store-bought graham cracker crust works great.
- Use a Food Processor: Makes crust mixing and filling blending ultra-fast and smooth.
⚠️ Allergen Info & Diet Versions
- Gluten-Free: Use gluten-free graham crackers.
- Dairy-Free: Sub dairy-free cream cheese and butter; skip or sub the whipped topping.
- Nut-Free: Naturally nut-free, just double-check cracker ingredients.
💡 Healthy Tips & Nutrition Notes
Lighten it up with low-fat cream cheese or Greek yogurt in place of part of the full-fat version. You can also cut the sugar slightly if your pumpkin puree is naturally sweet.
🛒 Mini Shopping List
Pantry:
- Graham cracker crumbs
- Sugar
- Ground cinnamon, nutmeg, cloves
Fridge:
- Cream cheese
- Pumpkin puree
- Eggs
- Butter
- Whipped cream (optional)
Pumpkin cheesecake brings all the cozy, nostalgic vibes of fall—with just a little more elegance and a lot more creaminess. Whether it’s the grand finale to your Thanksgiving dinner or a “just because it’s Tuesday” dessert, it’s the kind of treat that earns its place on repeat.
So be honest—do you sneak a slice the night before the big meal, or do you play it cool and wait for dessert?
Wrapping Up – Thanksgiving Recipes
So there you have it—21 of my tried-and-true Thanksgiving recipes, each with its own story (and a few kitchen disasters along the way). Whether you’re hosting a big crowd or keeping it small this year, these dishes will make your feast one to remember. Thanksgiving is all about love, warmth, and, of course, good food.
Which recipe are you most excited to try? Do you have a Thanksgiving favorite you’d like to share? Drop a comment on my Pinterest —I’d love to hear your stories and see how your dishes turn out!
Happy Thanksgiving and happy cooking!
For more healthy recipes CLICK HERE!
Or check my Pinterest board with Holiday recipes collection.